Monday, November 23, 2009

Wicklow Workshop October..

Here is my set of pictures taken on my first photo workshop with the guys from explorelight (Peter and Ed Gordon). Find out more about their upcoming workshops here, I will try and see to sign up for the ones at the West of Ireland.

They take care of pretty much everything, drive you around different sites, depending on the quality of the light for that day. For this specific workshop we followed this route..

route


GlendaloughFind the photographerOLYMPUS DIGITAL CAMERAFall @ Wiclow  
   
del.icio.us Tags: ,,,,

Sunday, November 22, 2009

Haarlem, Netherlands

As part of a quick business trip decided to do a morning side trip to Haarlem just between Schipol and Amsterdam.

How to get there..

From Schipol take the 300 Red Bus just outside of the airport terminal, and go until the very end of the route. You can find more information here. The bus service is perfect as it runs on its own road, so there is never traffic.

The bus will drop you at Haarlem rail station.

Walk towards the city center, see attached my route. I actually got lost coming back from the city center back the bus station but bumped into this housing area perfect for shots.

The main photographic areas for Haarlem are definitely the

  • Windmill (The Aadrian)
  • Grote Mark In the center of town
  • Cathedral in the Center
  • And the little neighborhood area along the Pieter Kieestraat.

Here is a quick video of the things you can hope to find in Haarlem…

The Aadrian…

Is better if you get to the Aadrian before dawn, as you can still use some of the street lighting to help you with the exposure. After 6 am then, the lights will go off making it significantly darker and at Fall the sun will be coming down right behind it, making it lose quite a bit of detail.

The cathedral is quite nice, but on a Sunday there is a market and if you dont get there earlier than 7am you will be fighting for space with the street vendors, so better go during the week or on a Saturday.

The market provides lots of opportunities for people and food shots such as this… Eel on a stick..


Once you make your way back, try and see the neighborrhood along Pieter Kieestraat, lots of little white houses with flower pots perfect for postcards.

If you can once you ge the bus back, there is housing community with very interesting architecture 3 stops before Haarlem.

Here is the equipment used for this session

  • Olympus E3
  • Olympus E30
  • Olympus EP-1
  • Zuiko 50-200mm 2.8
  • Zuiko 11-22mm 2.8
  • ND Filters
  • Manfrotto 190XPROB
  • Manfrotto Ballhead
  • Thinktank Street Walker Pro
  • GPS AMOD
  • Hoya Polarizer Filters
  • Saturday, September 19, 2009

    Rock of Cashel

    The Rock of Cashel is a landmark in Ireland for most tourists and is one of the oldest pre-Norman castles in Ireland. The Rock of Cashel served as the traditional seat of the kings of Munster for several hundred years prior to the Norman invasion. Few remnants if any of the early structures survive; the majority of buildings on the current site date from the 12th and 13th centuries. Cashel is reputed to be the site of the conversion of the King of Munster by St. Patrick in the 5th century AD.

    Here is the equipment used for this session

  • Olympus E3
  • Olympus E30
  • Olympus EP-1
  • Zuiko 50-200mm 2.8
  • Zuiko 11-22mm 2.8
  • ND Filters
  • Manfrotto 190XPROB
  • Manfrotto Ballhead
  • Thinktank Street Walker Pro
  • GPS AMOD
  • Hoya Polarizer Filters
  • I decided to take a different approach to the pictures using Hore Abbey on the foreground at dawn. Here is a view of the Abbey from the Rock of Cashel.

    Here is the location on the map where I positioned myself in the morning, which is right behind the stone wall on the left.

    image 

    I drove from Thurles which is a 30 minute drive coming from the North, but is actually a 2hr drive from Dublin. You can come from the R505 and make a right on St Patricksrock. The abbey is on a field with some cows (careful with the poop) . Looks like a private field but people camp there, and on the same day  at least 3 groups of photographers on the same area so get there early to claim a spot.

    During summer time the sun will come out directly behind the castle creating silhouettes, fog will be there almost for sure so it could create pretty nice effects, this will give you more time to drive around and take some shots of the castle from the other side, then you can go back to the Abbey once its lighted.

    Here is a video on how the place looks at dawn during the summer:


    If you want to use some farm animals on the foreground, just make sure you are aware of the sun position, as animals tend to move to look for the first sun rays to warm up.

    As you drive back to Dublin or leaving Cashel take the back roads as there are great opportunities for pictures of farmland, houses, churches and landscapes, I took advantage of this cemetery outside of Thurles


    Saturday, August 29, 2009

    Olympus EP-1 Walk about Dublin

    I just shot my first video with the recently released Olympus EP-1 camera. I purchased it in the US trough Amazon.com, visit the link to see the kit that includes the 17mm f/2.8 and the Olympus Optical Viewfinder.

    I decided to go for the 17mm lens as I already own several wide angle and telephoto lenses for other Olympus cameras so I am eagerly awaiting the 4/3 converter in pre-order also in Amazon. Not sure if all sw functionality will be available trough the converter but we will see.

    I am looking at this camera as a way to have a high-quality point and shoot when I don't want to haul all my equipment and long lenses for a few quick and dirty shots, so downgrading from SLR to this is a though proposition but I can see how somebody trying to upgrade from a regular point and shoot can be more than pleased with the high quality shots u can get out of this baby.

    After taking the camera to its first trip, here is what I have to say…

    The good:

    1. It shots on RAW (there are still no converters for Lightroom but Adobe has come up with a beta version of camera RAW that can convert the EP-1 files into DNG so then you can manipulate anywhere. Follow this thread to get the download of Adobe Raw RC 5.5 which will allow the conversion of .ORF from the EP-1 to DNG to be used anywhere including LightRoom.
    2. Feels very sturdy with the metallic body
    3. Viewfinder is great where the sun is out (not very common in Ireland) and you need to take a shot
    4. Fast autofocus
    5. The 17mm 2.8 lens is pretty fast
    6. Good video quality, even in low light
    7. Art filters are fun to use both with video and stills
    8. Very original, retro look
    9. Is fun to use the same concepts of still cameras to video such as f-stop, ISO, etc.
    10. iAUTO mode pretty accurate on the settings
    11. Large, nice big display on the back. Wish my E-3 had something similar
    12. Level is very useful when shooting trough the LCD, gives you a good idea how straight your shot will be
    13. Very impressive quality on high-ISO (for an Olympus) I think it has better quality shots at ISO3200 than my E-3 or E-30
    14. Using the SanDisk 32GB memory card the writing of both RAW and Video happens very smoothly and quick. I can record video, switch to camera without even noticing
    15. The feature to take a still at the end of the video comes pretty handy
    16. Can control aperture when recording video

    I have never shot video (as you can see on the quality of the footage, but this will give you an idea of the quality of both stills as well as video).


    Things to improve on 2nd release:

    1. When using art filters autofocus takes quite a while
    2. Video with some art filters can be a little jerky (slow motion kind of look)
    3. For a small camera it feels heavy, heavier than the Oly E-420 if comparing just bodies
    4. Strap seem a little heavier and gets in the way of shots
    5. Would it have been nice to have a wrist strap as well
    6. Small lens cap for the 17mm is too small without any attachment to the camera, I am sure I am bound to lose it
    7. SW takes a little bit to get used to even if you use Olympus cameras, the dial on the top and on the back to access and manipulate various controls can be confusing or not very intuitive at times.
    8. For the price, they should have included some screen or camera pouch!
    9. Not having on the screen or the viewfinder the focus points being displayed can be very challenging when trying to use autofocus or MF.
    10. Video sound is OK, as soon as the lens needs to autofocus the sound of it can overtake ambience sound, very bad issue I think

    Monday, August 24, 2009

    Photowalk around Morocco

    Morocco route

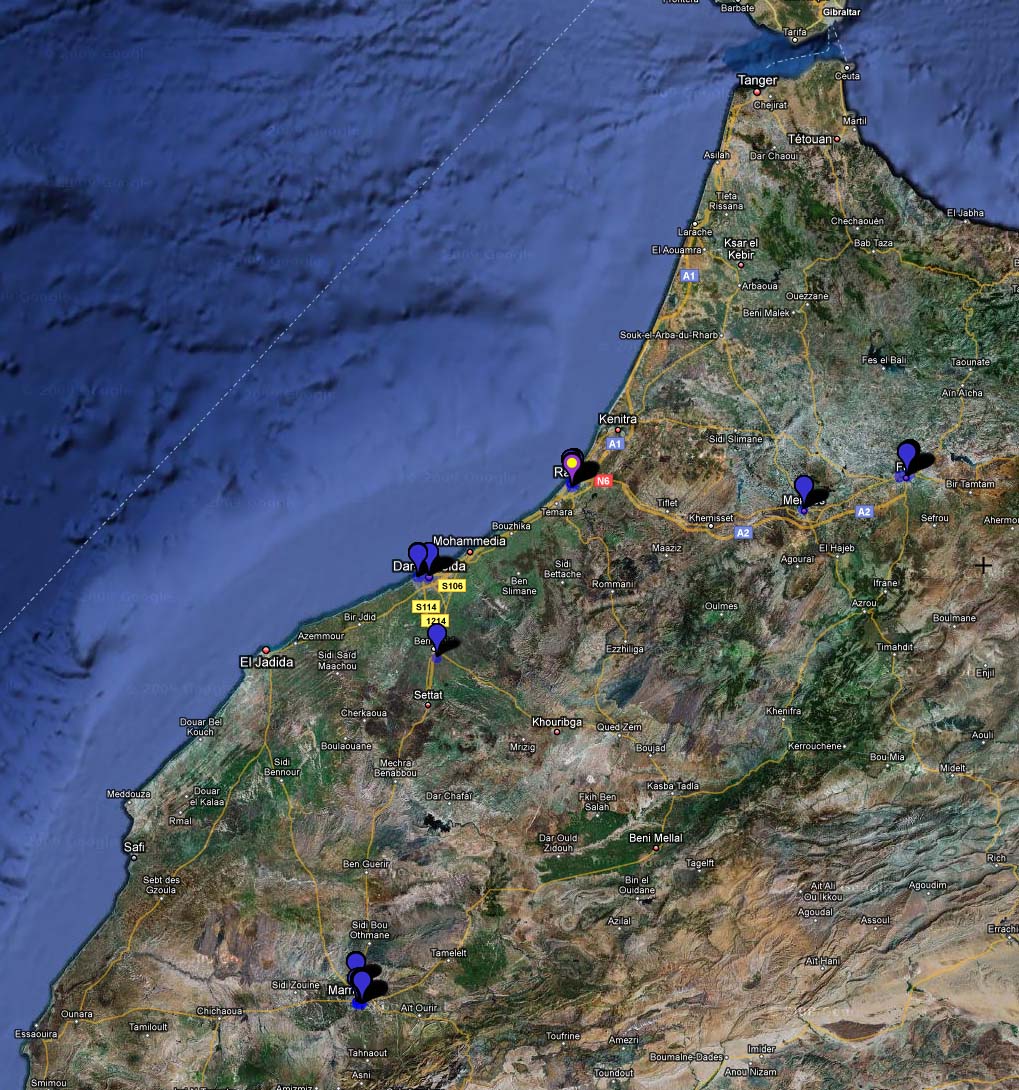
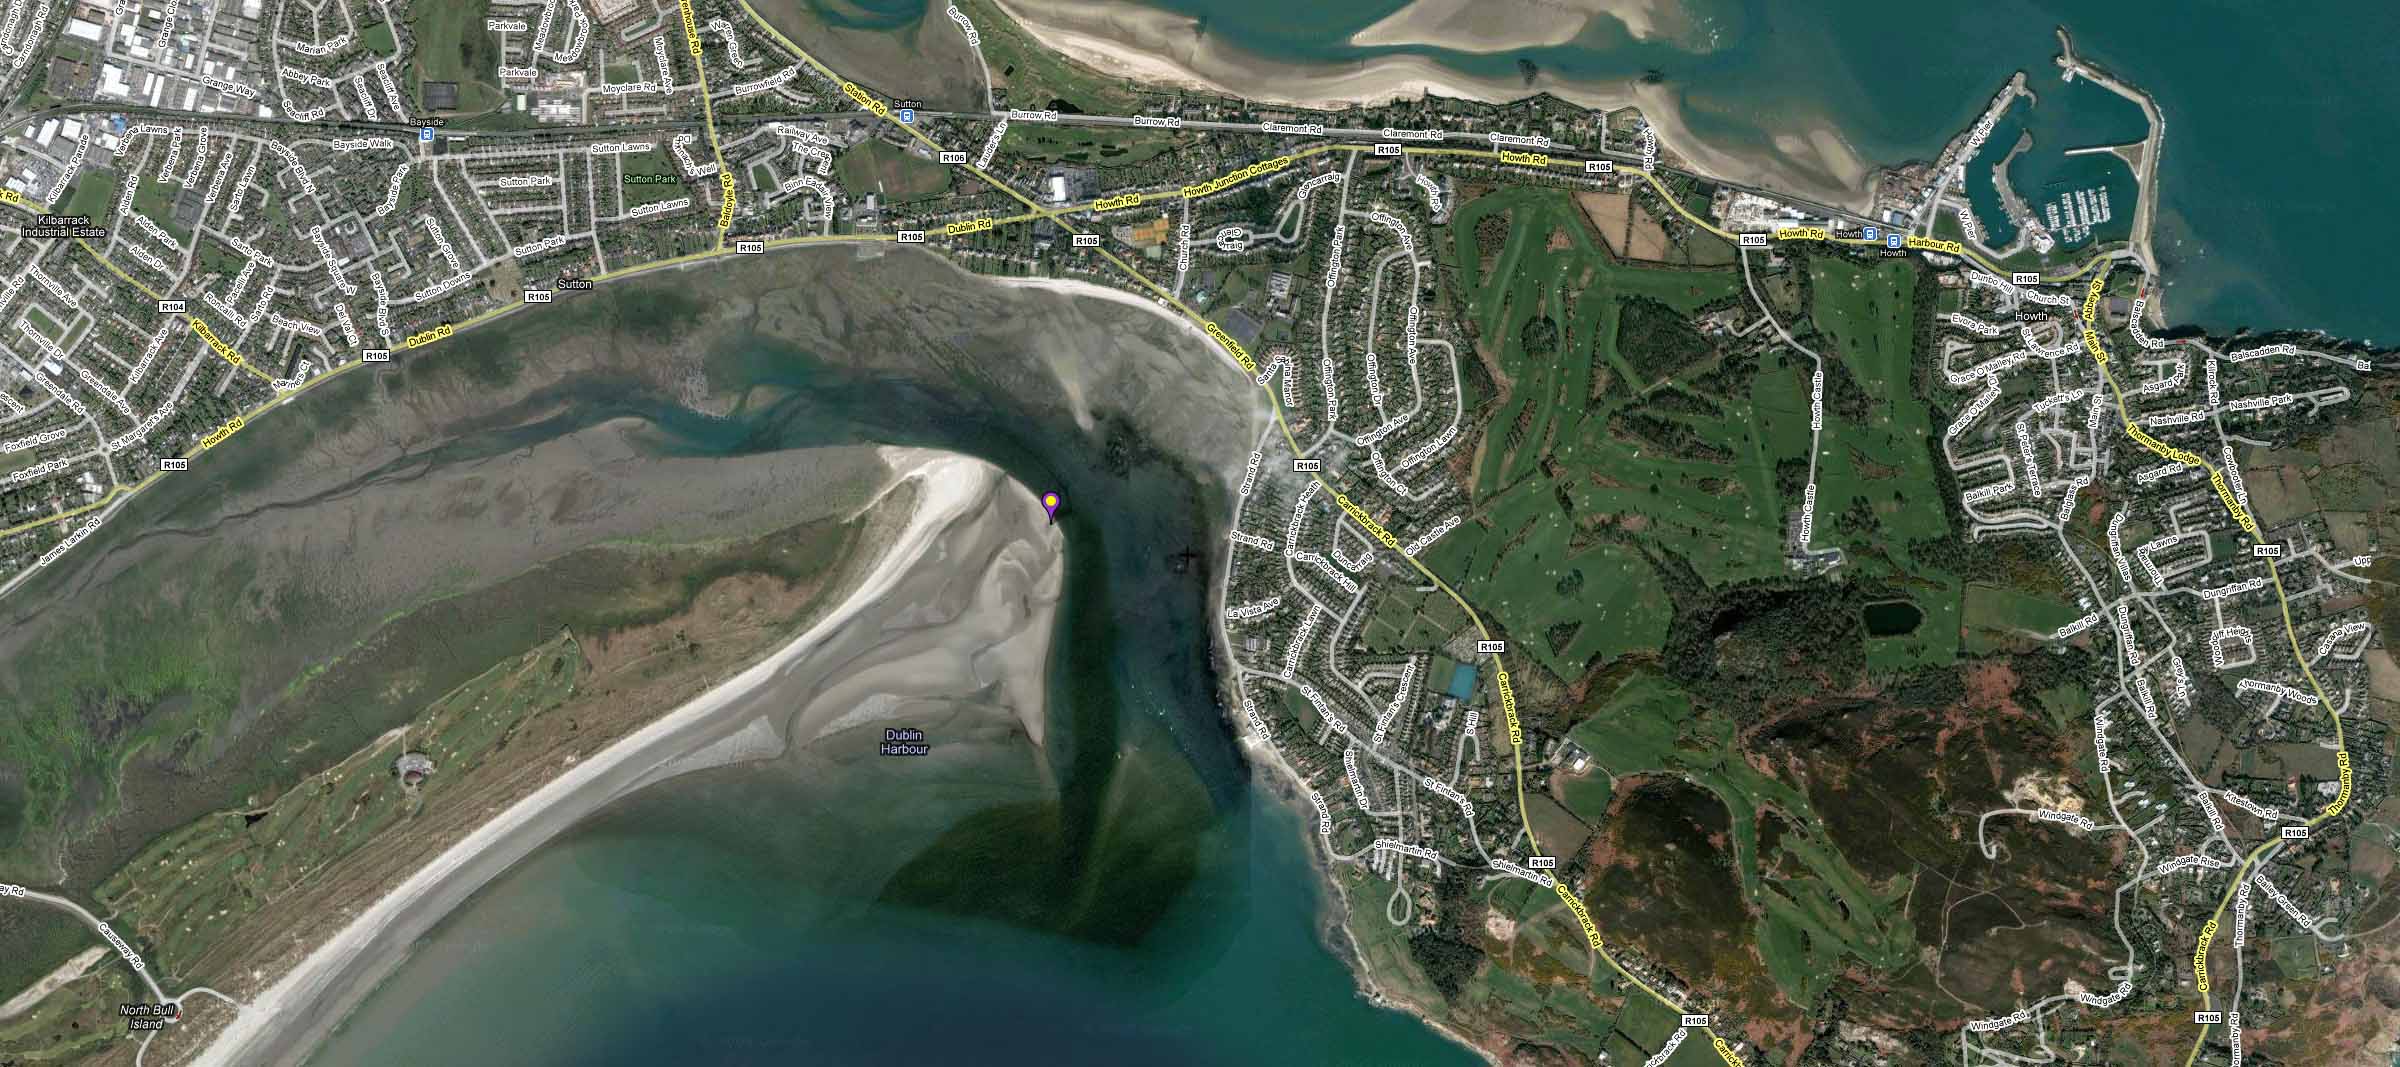
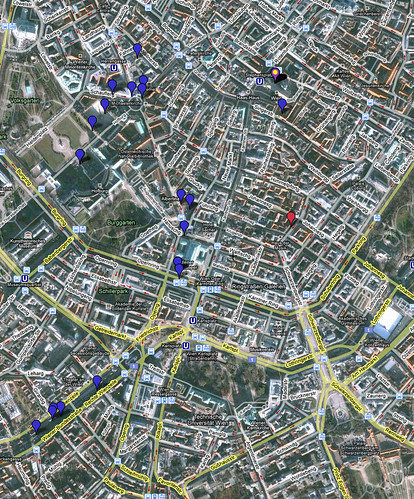
    We flew from Dublin into Malaga, Spain and via coach crossed the ferry to Ceuta Northern Africa (which is still Spain) and then cross the border into Morocco.

    In general Morocco feels safe, however large equipment and lenses do call attention. I would feel comfortable walking with my equipment at night on touristy places such as Marrakech, but on some other places like downtown Rabat some of the streets can be scary. Leave some of the equipment at the hotel safe and take only with you what you are going to use.

    Equipment

    If you bring anything to Morocco, bring a polarizer filter  :)

  • Olympus E3
  • Olympus E30
  • Olympus Flash FL-50R (Very useful for alleys at the Medina)
  • Zuiko 50-200mm 2.8
  • Zuiko Teleconverter 2X EC-20
  • Zuiko 11-22mm 2.8
  • ND Filters
  • Small Table top tripod (Gorillapod)
  • Hoya Polarizer Filters
  • Fes

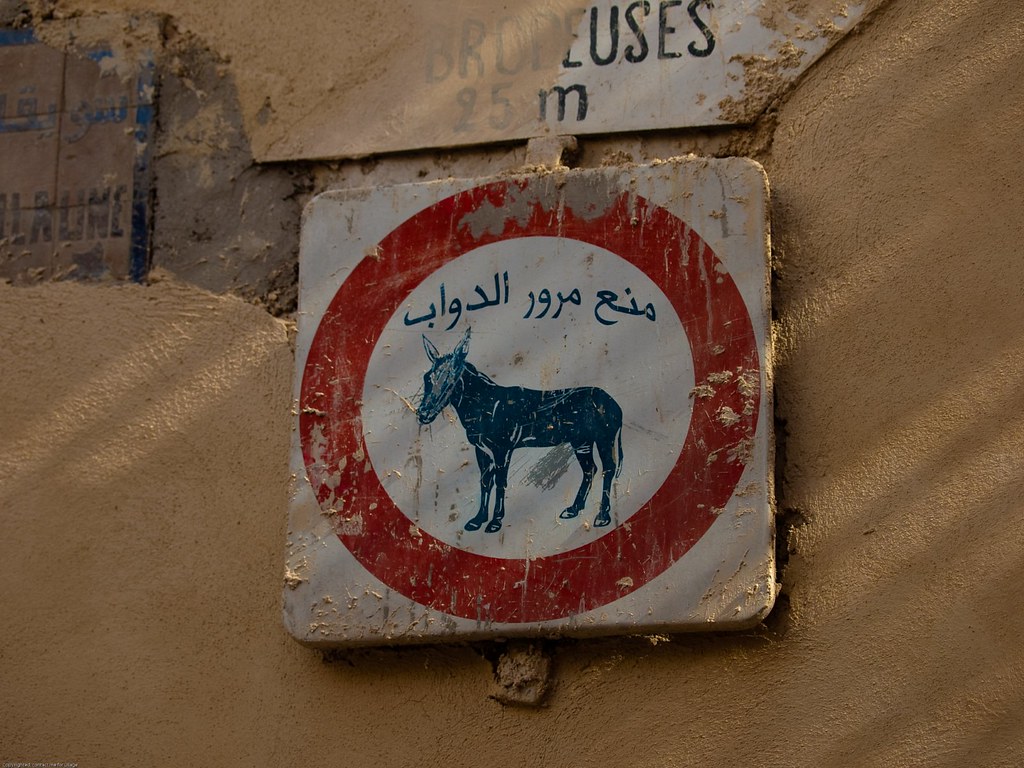
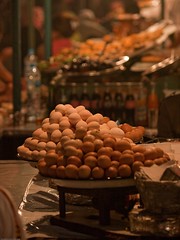
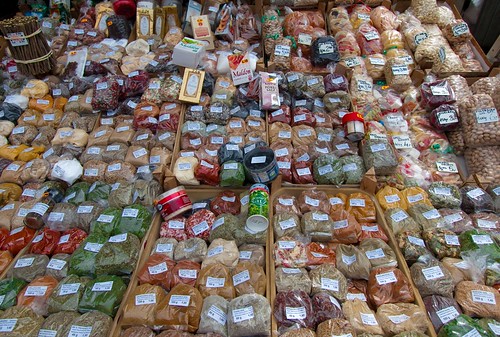
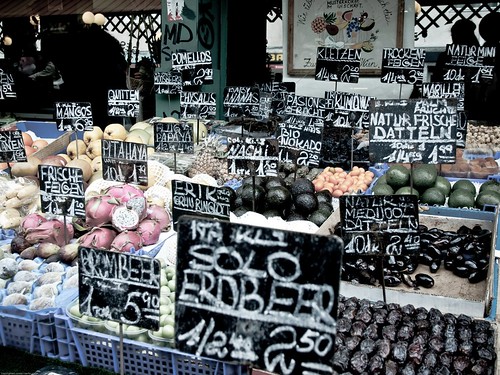
    The most important thing about Fes is the Medina (old city) is almost like being in India (Varanasi) where you will walk around food stalls, people selling clothes, artifacts and more. If you use a GPS, don't be surprise if you lose connection on the narrow alley ways.

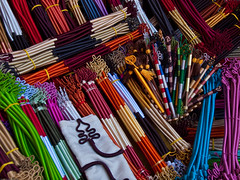
    At the medina there are great opportunities to take colorful pictures of food, donkeys and more.

    Important thing to notice is that in Morocco other than in Marrakech’s Djemaa el Fna square, people don't like their picture taken. Be very mindful as picture of women (alone and accompanied) can be very offensive for them. I managed to get a couple of candid pictures, and as always no matter the culture is,  kids are always very open to having their picture taken.


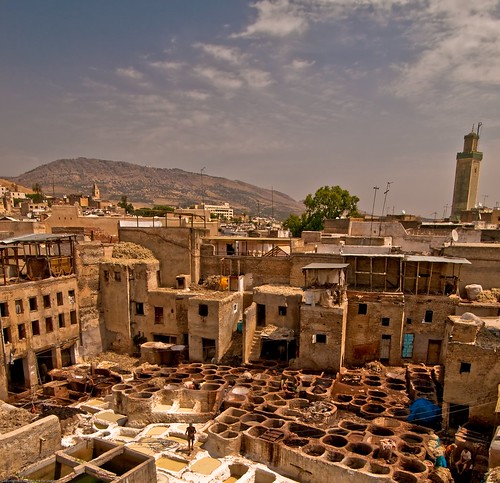
    This kid kept following our tour group, so while waiting to enter the tannery I asked him if I could take his picture, very seriously he said OK, but after I showed him his portrait on the LCD screen he smiled and ran away. I would recommend bring small trinkets for the kids (pens, candy, cheap small school supplies, or money from other countries) be careful on how and when to give them as you can quickly have a huge amount of kids surrounding you and that can get dangerous.

    While walking in the Medina, is hard to manage removing and puting back on the polarizer, you will lose at least 1 f-stop on what are very narrow and dark streets. I suggest you leave it on, and either compensate +1 steps or bump your ISO to 200-400.

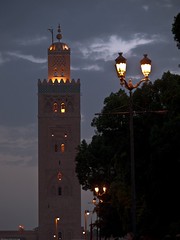
    In Fes as in all of Morocco the harsh light is present from very early in the morning 7am for the whole day, clouds are rare, so rather than wait for the most optimal light, live with it and make the best of your shot

    Marrakech

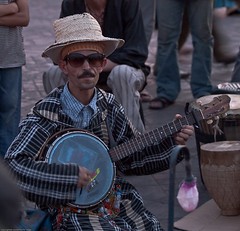
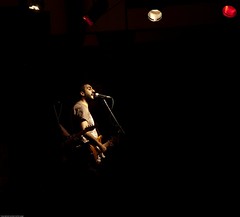
    The most impressive place in Marrakech is without a doubt Djemaa el Fna just the sheer size and amount of people can be very intimidating. This is definitely one of the places I would go back for picture opportunities. I believed I lost a lot of great pics because of the hour we got there, the heat and the fear you can feel mixing with strange people, heat, snakes, monkeys and food.

    Beware of the heat as well as your equipment, Marrakech is the entry to the Sahara and in August it can get up to 54C, 135F. I swear my E-3 stopped focusing when it reached 55C on the sun, weird.

    The plaza has a different feel at different times, at evenings is a great place to take picture of people, food stalls, etc. Beware, there are hundreds of tourist here getting hooked by locals in trying to get their picture taken with their animals. Dont agree to anything until a price has been reached. First negotiate with them for the pictures, then allow them to put the monkey, snake or other on you. They will begin at 300 dirham (around 30 EUROS) but you can take them down to 50 dirham. If aggressive just tell them you will go get the local tourist police and they will back off, they are truly afraid of them.

    Another good things to do at night or day is take a seat on one of the cafes above the stores surrounding the square, this have balconies that can make for great photo ops, with a long lense you might get away with some great shots.

    During the rest of the day the plaza is full of street performers, orange juice stalls (don't be afraid of trying it, best frozen orange juice I have ever had)  and cafes.

    If you go into the Medina, its not nearly as impressive as the one in Fes, it might be worth a stroll, but other than that, not much.
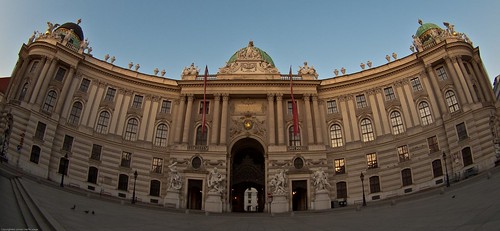
    Rabat

    I didn't get to see much of Rabat, the capital of Morocco, we stayed in a central hotel which was not very nice. The central streets of Morocco are going a lot of renovation and can seem scary at night. You can tell is not a town used to tourism as people will stare right at you. Also notice how in the French style cafes, only men no women or couples sit down outside to look at the bystanders.

    In Rabat there are some famous Roman ruins, Its not  a very nice neighborhood so it should be safe to walk there at sunrise. It should make for a very nice shoot, (I didnt get to do this). The place is called Chellah or Sala Colonia.

    We walked to city for a little bit as there were some celebrations due to the King’s ascension to the throne. This is July 30th, unfortunately the king wasnt in Rabat so the celebrations were OK, if you can be on the same day and the same city where the king will be, there is a very nice parade and fair as I saw on TV later that night. We just managed to see an open air concert

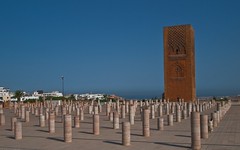
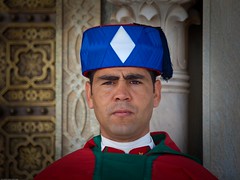
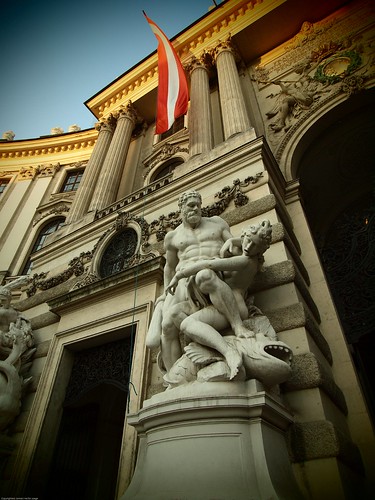
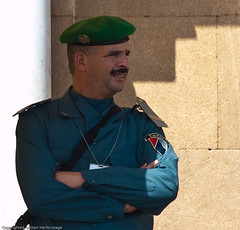
    Impressive about Rabat is its mausoleum of Mohammed V. Bring a long lense and wide lenses to capture details as well as the size of the place.

    Guards are allowed to have their picture taken with tourists, for some reason this guard was pissed off at me for using such a long lense to take his portrait. He argued with a tourist police (brown uniform) but there was nothing that he could do.

    Another site is the Royal Palace where the king lives, a little bit disappointing as even though nice, you are only allowed to stand 100 meters from the royal palace entrance. The palace kind of looks like an expense California style house in my opinion. Bring a long lense (200mm) and have fun trying to take pictures of the guards and other servants.

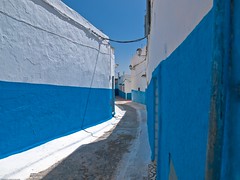
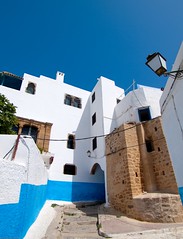
    By far the best site in Rabat is the Kasbah of the Udayas, great for people shots (if you pay in advance, $1 or $2 EUR) beautiful architecture that reminds of you of Oia, Santorini in Greece. Spend as long as you can as the sun, and shadows make every street look different.

    There is also a spot that I didn't visit which is the River Marina, North of the Roman ruins, this reminds you of a French village with its fishing boats and people swimming.

    Casablanca

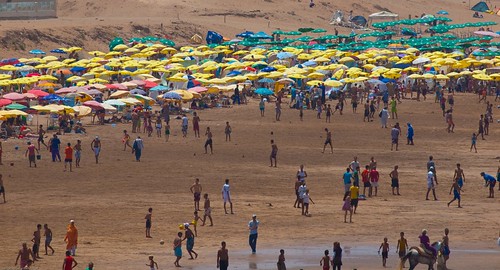
    Not much to see in Casablanca, nice little city, more famous from the movie than for anything worth visiting, however walk around the marina and on a hot summer day try to count the people bathing in the sun.

    Tanger

    Not much to see in Tanger, its a good stop before taking the long drive back to Ceuta, if you want stroll around the beach and see how people walk and bathe on the sea.

    There is much more to see in Morocco, that is a place worth visiting several times with a personal guide. Marrkech is considered to be the entrance to the Sahara desert, as well as spending more time in places like Fes and Marrakech would be worth another visit.

    Sunday, July 19, 2009

    Bull Island Seals Dublin Photo shoot

    Bull Island is located just south of Howth, around a 10 min drive from Howth harbor. It is a nature reserve, so make sure to follow the rules listed there. In order to find the seals you need to park on the northern part of the Island (Second bridge if you are coming from Dublin)

    Park your car in the sand parking lot, and get ready for a 20-30 min walk. Here is a quick map on where you will find the seals my location is marked with the purple marker.

    For Olympus RAW file usage with GPS I recently discovered GeoSetter, great tool that can work with the .ORF files, write the .xmp card or directly into the file to accommodate GPS data. Highly recommended.

    Funny enough this map shows the exact GPS location where I was located, but bear in mind that the tide changes, so that area could be covered with water any other day, but I have been there 3 times and the seals are always located on the northernmost corner of the island, but not all the time laying on the sand, which was the shot I was looking for. After a couple of tries, here is what I managed to get prior to this day..just a few head shots.

    I believe that in order to get shots from the seals outside of the water there must be a reasonable amount of sun and a low tide, this last time I went was around 9AM, so I dont think the hour in the day matters that much.

    My Gear:

  • Olympus E3
  • Olympus E30
  • Zuiko 50-200mm 2.8
  • Zuiko Teleconverter 2X EC-20
  • Hoya Polarizer Filters
  • Lowepro FastPack 250
  • Wind resistant pants and jacket
  • Wellies

    After a good 30 minute walk,  and depending on the tide you will find the seals at the northeast corner, approach very slowly and be very careful of the sand. I misjudged some weed and sand banks and went right in all the way to my knees covered with weed,sand and I am sure smell liked shit.  Once you are 50-75 meters away from the seals lay down on the sand, take your gear out and start approaching them by dragging yourself trough the sand, if the seals see something taller or something similar to a human shape they will dive right into the water.

    Take a few shots and get closer, make the seals comfortable, and then get closer again, if some of them get scared and dive into the water stop immediately, stay still for a few minutes and move again. I saw a group of 15-20 seals but as I got closer and the tide rose few and few seals remained.

    Use your bag as a bean bag and start shooting, I used Shutter and Aperture Priority Mode, low ISO (100) and a polarizer filter. I tried some shots with the tele-converter but I thought I was sacrificing too much sharpness, so decided to get closer and also crop some of the images to close-in the seals.

    Being gray seals, the metering system will struggle with the light measuring of both the harsh light reflecting on the sea and the dark features on the seals faces, so compensated with EV+1 to bring some details on the face, or try and fix on post processing.

    Puppies are very curious so they are the ones that will be the most active and will get closer to you, but be careful in never getting between the puppy and the mom, as they will feel threatened. Also as some seals go in the water be aware always of where they are, they can come out behind you and you dont want to be too close, a seal bite can be very nasty and have lots of bacteria in their mouths that can cause a big infection.

    I lost a very good shot of a fight between 2 adult seals. If you see a seal approaching another one, and their heads are close to each other,  one of them will open its mouth that’s the beggining, put your camera on burst mode and do some manual focusing as you will see a fight that will only last for a few seconds.

    Always be mindful of the tide, if you think that the waves are getting closer and closer you are right. Usually the seals are on a spot higher than the tide, that means that if you are not careful you will end up on a little sand island surrounded by water that is rising, believe me I was stuck once and had to walk with water up to my knees hauling my gear, hence the wellies. Once you get home, clean your equipment right away, there will be sand between the extension part of your lenses and all around the buttons, even though the E-3 is weather sealed, clean this with an air brush as you dont want corrosion. For your bag, wait for the sand to dry and then shake all the sand off, there will be a lot of sand accumulated on the back area of the backpack that you wont see but once it dries it will come off rather easily. If you want to see the whole set of pictures visit my site at flickr here..

  • Saturday, July 11, 2009

    AIB Street Performance World Championship

    During the month of June (18th to 21st) there is an event in Dublin at Merrion Square sponsored by AIB that brings together street performance from all over the world. You can visit their website here, and follow them on facebook as well.

    I didn't manage to get many shots but was able to get a couple of good pictures, here are some tips on the event if you want to try it next year .

    First of all bring a telephoto lens, unless you are looking for a specific shot a wide angle lense might not do you much help as the crowds, sun might make it hard to get a good photo.

    Plan in advance what you want to see, as for location, here is a good tip: get there early, is very crowded and not much space to move. Here is a piece of good advice, locate yourself in the corner of the park marked below, it has a grassy hill that people use as a seating area, if you get there early you will be able to get clear shots of the show. The green arrow shows the corner of Marrion square where you should be position yourself. Download the schedule and wait for the show you are interested to arrive there, across the 4 days all shows would have hit that single stage.

    image

    I was able to get clear shots of a couple of acts such as these:


    As always in Dublin, be prepare for the rain, the organizers will provide ponchos for the crowds to use as seat covers for the wet grass, but bring something for the camera.

    Once the shows starts, crowds start to gather, pay attention not only to the performer but people’s reactions make for great candid shots.

    If you are interested on the whole photo set visit my site at flickr

    Thursday, July 9, 2009


    Wednesday, May 13, 2009

    Vienna photowalk

    A couple of weeks ago had the opportunity to spend a couple of days in Vienna and brought my equipment with me. Here is a list of my equipment for this occasion:

  • Olympus E3
  • Olympus E30
  • Olympus Flash FL-50R (Very useful while inside a Barn)
  • Sigma 30mm 1.4
  • Zuiko 8mm 3.5 (great for cow and calf close-ups)
  • Zuiko 50-200mm 2.8
  • Zuiko Teleconverter 2X EC-20
  • Zuiko 11-22mm 2.8
  • ND Filters
  • Small Table top tripod
  • Hoya Polarizer Filters

    Most of the sites worth visiting in Vienna are contained within the city center and easy to get around either by walking or tram.

    Here is an overview of the walk by using my AMOD GPS tracker as well as GeoSetter for attaching  GPS coordinates for my Olympus Raw Files. One thing I have found out while traveling on old cities with narrow streets is that it will be common for the GPS to lose connection with the satellites, so make sure you adjust your settings to your Software accordingly to ensure that you tag the picture to the closest available tracking point.

  • Vienna Photowalk

    A good way to track the main sites to photograph is by using the Rick Steves guides for Europe, I always travel with one as the contain easy to follow maps as well as tips for avoiding crowds, using public transportation, etc.

    Some of the highlights of the city are:

    NaschtMarket:

    Located between the left and right Wienzeile, the Naschmarkt extends from the Kettenbrückengasse to the Getreidemark, on an elevation to the Secession.

    Differently to as the name implies, there aren’t only sweets to buy at the Naschmarkt: Fresh fruit and vegetables from around the world, exotic spices, meat, fish and ecological foods are offered for sale on the colorful market stands. Early in the morning cooks and chefs already crowd around the market looking for fresh specialties. Later, after a Viennese breakfast in one of the numerous cafes, bars or delis located around the Naschmarkt, the "laymen" start their search for culinary treats. Delicacies from the Naschmarkt make a favorite gift with Vienna holiday-makers.

    Spices Sale on....????  

    On Saturdays you'll not only find delicious treats at the food market but also curiosities, old and beautiful things on the street market stalls adjacent to the Naschmarkt. The wares offered are completely mixed, for beautiful souvenirs it helps to be a skillful bargainer.

    There are great opportunities for those that also want to take candid pictures of people haggling (specially on the antiquities area at the end of the market), friends having breakfast and the intellectual crowd.

    A tiger in the Naschmarkt The dude and the DJ Lady @ the market

    Opera House and Concert Hall

    Try to attend a music concert either on the Opera or the Music Concert Hall. Its allowed to bring your camera but not a tripod. You can see people dressed as in the times of Mozart. As well a both buildings have great architectural detail. Make sure to boost the ISO and bring a sharp lens

    CandelabrosOpera and Tram

    City Center

    Within the Opernring there are lots of opportunities to take advantage of the city architecture. Some examples are St Stephens Cathedral, Rathaus, State Opera, among others. It gets very crowded, what I ended up doing was getup at sunrise to take full advantage of the buildings without any crowds. You can check the sunrise and sunset times throughout the year for most cities in the world here.


    Pointy little hats A prayer
    P5019241 Golden Mozart
    Entrance to Vienna Austria

    Places I've shot in