Friday, August 29, 2008

Tip on... Hostile climates

Here are some tips when going to extremes in relation to climate

For cold temperatures

Batteries dont like cold weather. If you look at your camera manual you will usually see 2 different sets of values for battery life, one for normal conditions and another one for freezing point. Usually battery life is reduce by half on near freezing temperatures. For example the Canon EOS 400D battery can take 500 shots at 23degrees centigrade but only 370 at 0 degrees.

One good tip is to keep your battery inside your coat, this way it can use your body's temperature.

Another concern in some cameras are leaf shutters on traditional large format cameras where the lubricants have become viscous in low temperatures. Some plastics can become brittle, and while not a problem for camera, it could be for accessories

When taking pictures in the snow and things like skiing or snowboarding there shouldn't be a problem with the snow if it remains frozen, problem is when you move indoors. This water could sip into the lens joints and other areas. So be careful of wiping your camera before you go indoors or putting it inside your coat.

Condensation can also be a big problem. At best it is a nuisance. the lens becomes misted up and the camera body become damp. At worth though the condensation may penetrate the camera and damage the electronic if the camera is stored damp, cause mould and fungus to appear

What you need to do is put the camera away in a bag or case before you bring it indoors, and then let it warm up naturally for an hour or so before opening up the bag, it doesn't have to be airtight because there is no pressure difference, you are simply preventing the warm air from circulating around cold equipment

For hot weather

When it comes to the sun, cameras are pretty hardy the only big nuisance is that the black plastic on which cameras are built, attract the hear, which could cause your camera to become so hot that it cannot be operated for a few minutes.

For hot weather your worst enemies are moisture and dust

Sand is a real killer when it comes to lenese, any grit can lock up a precise and delicate mechanism of the camera and or lens

This is critical when trying to exchange lens in the middle of a dusty environment. If you have to, you should turn away from the wind, and face the camera downwards to minimize the risk of particles getting into the camera body.

In some environments, fine dust particles are suspended in the air and will enter the camera body even if perfectly still conditions.

Never put your camera away damp.

Thursday, August 28, 2008

Herramientas para lightroom

No soy un experto en Lightroom pero queria compartir algunas de las herramientas que usado para maximizar la funcionalidad de LightRoom 2.0. Aqui esta una lista de lo que he usado..

Matt's Dramatic Sky Presets

Este preset hace una gran diferencia en cuanto a incrementar los tonos azules del cielo, funciona a un mejor cuando el cielo tiene nubes. Aqui hay una muestra

image

image image

Original Picture

Using Dramatic Sky Level 3

ND Graduated filters..

Este set de presets son un grupo de presets que ayudan a contrarestar el problema de dynamic range que muchas camaras no pueden controlar (Cielo demasiado claro, con una exposicion correcta en el objetivo). Estos presets tratan de copiar la utilizacion de filtros ND en el campo. Los presets son de 1, 2 o 3 stops algunos de ellos son horizontales y otros verticales.

Aqui una muestra de como se ven.. cada uno incluye alrededor de 18 diferentes presets

image

image image

Original Picture

Using ND L 2 stops

Presets Edge Darkening

Estos simplemente usan la funcionalidad de Vignettes en LR 2.0 Son presets para crear vignetting.

Perfiles para camaras en LR

Esta funcionalidad para LR, crea un nuevo grupo de prpfiles en el menu de Camara Calibration del modulo de Develop en LR. Estos son profiles creados por las companias que manufacturan las camaras que representan el mejor profile para cada camara. Esto trata de solucionar el problema donde una imagen se "ve" mejor cuando es abierto por primera vez en el SW nativo del proveedor que con LR. (por ejemplo Olympus Master2.

image

Mejorando el flujo de trabajo con Smart Collections

Esto es probablemente la funcionalidad que mas me ha ayudado, el uso de esta nueva funcionalidad en Smart Collections de LR2.0 crea una serie de filtros basados en Smart Collections que pueden ser customizados para el workflow de cada quien.

image

Para alguna pregunta dejen un comentario en el blog...

Wednesday, August 27, 2008

Tips on...<Panning>

Select a location

You want a location that offers a relatively homogeneous background but not a solid color. A bald white sky wont show paning streaks.

The background can be a hue of colors with a dominant one or a mix of colors, but look for a palette that contrasts with the subject

Avoid isolated vertical objects such as telephone poles, with vertical energy that will break the flow of the panning

Select a position that allows the subjects line of travel to be roughly parallel to your cameras imaging plane

Use your whole body

Start by aiming your feet where you think the pan will end. Next from your hip, twist to point toward the oncoming suvbject. AS your subject passes by simply unwind around your body's center of gravity. Panning happens in the torso, your arms, wrists and hands are stationary.

Hold the camera level and as tight in as possible, dont move your feet.

Practice untwisting in advance, and as your suvbject approaches try to pick it up before opening the shutter

Set the shutter speed

Its critical to use shutter priority or manual,. Shutter speeds can range from 1/125 down to 1/8 secs depending on the spoeed of the subject. The slower the shutter speed the more dramatic the shot but also the fewer successes you will ge.

For cycling 1/15 or 1/30 should be good.

Set an ISO that provides good exposure at one of those speeds.

Turn autofocus off

Pre focus manually on the subject's mark

Shoot in continuous mode

Fire off as many shots as possible during a single pass of the subject

One reason to use manual instead of shutter priority exposure is to ensure that the exposures in these sequences will match

If subjects are still not sharp here are some other tricks

Set a higher shutter speed

Hold the camera tight bracing your elbows against your body

If you use a wide angle lense and get in close to the action you will increase your chance of success. Also both to sharpen and to open uo your subject, pop a flash

del.icio.us Tags: ,,,

Tips on..<Time of the day (Urban)>

Dawn

The cold blue light of dawn is extremely complementary to urban landscape shots, accentuating the steely exteriors and the smooth glass facias, This soft light is great for shooting images that yo dont want over-ridden with shadow.

Check the weather forecast and pack your gear the night before instead of crashing around in the morning forgetting stuff.

Meter for the sky to maximize colors which will also maintain the rich hues.

A warm up filter in a color such as coral will also help create a sense of vibrancy in your shot. Obviously at this time you will face less hazel from security guards and police so make the most of this time. And make sure to bring a tripod

Midday

At midday the sun is at its brightest and creating harsh shadows. Use this to your advantage creating a contrast punchy look where the highlights and shadows conflict. Make sure you select your WB for a daylight setting and meter carefully for the midtones. Bracketing is a particular important at this time in the das as it might only be a matter of stops between a flat washed out image and a really striking one. To darken the blue lights bring a polarizer. This i also a great time to go inside the buildings and look for details and capture abstract shoots of things like foyers or office blocks

Nighttime

This lends itself to the more creative appraoch enabling for long exposures, lighting effects and reflections.

Riverbanks are a great location to capture city scapes as the reflection of the lights on the water creates a double impact.

Nighttime is about making the most of shapes and silhouettes, rather than intricate details, so cast an eye across the skyline for strong outlines and forms.

Usually the most dramatic ones are captured just before nightfall when there is still a touch of color in the sky

del.icio.us Tags: ,,,,

Tips on... <Urban Landscape>

Early bird catches the worm

Prospective perspectives

Your perspective should differ depending on the shape and form of what's before you. For square buildings try to shot at a 40-60 degree angle to avoid a flat image, for domes or curved shapes its important to feature some background in order to the viewer to appreciate the form

Up and coming

Should not only be dedicated to the built environment, take a look around you and see what's happening construction wise. Documenting a building going up can make a for a great addition to your portfolio, while renovations are always an interesting subject to shoot

Permission to shoot

Be aware that many places require you to possess a licence before you can shoot on its grounds. Just like a model release form these building release forms cover how the images will be used and determines who holds the copyright. You can often negotiate to exchange images in return for a photo pass.

Angle attack

The best way to find new approaches to shooting well known buildings is to approach them from all angles, Search for unusual features or crevices that are rarely seen in the usual publicity shots of that place, and go in from that angle instead. Look out for patterns, reflections and textures to really bring out the buildings characteristics

Once you have found a location the next stage is being able to approach your scene in a variety of ways photographically, playing on perspective, viewpoint and light. Look for places that will look great close up as abstract images but also will produce impact as a full frame image

Some prefer to shoot from a distance some prefer to accentuate angles and other shoot for pattern or repetition.

Place yourself where the reflective rays do not directly shine onto your lens, or else your images will be a complete whitewash. Sometimes a polarizing filter will help you manipulate reflective scenes to your advantage. It will enable you to suppress subtle reflections and darken any blue sky mirrored in the building's glass.

Many prestigious buildings will be flood light at night, which represents some challenges, The bright light coupled with harsh shadows makes it a tricky subject to choose. Underexpose then tweak if needed. Is better also to bracket your shots. Find a midtone and then use spot metering

Panoramas

Lens selection

Opt for a standard len to ensure threre is no distortion, Wide angle lenses are more susceptible to this than normal lenses

Steady now

Choose a tripod with a panning head to ensure a smooth transition that is level and lined up correctly for each shot

Shoot in line

Being taking your shots starting from one side and progressing to the other. Make sure you overlap your last shot by a third each time, to ensure they line up afterwards.

Make it merge

Upload your shots in Photoshop or a similar program. No matter the program, some editing will be required to make the images match

Use manual

To ensure that no readings are changed between lights, such as fstop, shutter speed, etc that could alter one of the shots you can use and make it look different from the rest

del.icio.us Tags: ,,,

Tips on...<Travel, Creative>

Unforgettable Images..travel

Heading off the beaten track is a guaranteed method for limiting your chances of cliched travel images, but remember that in this day and age you would have to be very quick to snap something that hasn't been photographed.

Boosting creativity

  • The use of unusual perspective is an obvious option for boosting creativity. Getting down low with a wide-angle lens of 24-42mm will give an extreme edge to any landscape, as will using a fish eye lens which will work to distort the trye dimensions of the scene in front of you
  • Timing of photography is another key factor in determining the result image. You could for example wait for what is assumed to be a remote untouched location to become swamped in rush hour traffic and then shoot for impact.

In detail

  • Homing in on small details is a superb stylistic point in many travel photography portfolios, whether it happens to be the people, a street sign, local product or something that springs to your attention just as you are about to the press the shutter button. Something as simple as a door knocker, a plate of food or even a ceramic tile provided it is photographed well and in focus, can reveal a lot about a different culture

Avoid the crowds

Get up early, the light is fantastic at sunrise.

Create a contrast

Always use a lens hoodon your camera lens. This way you will avoid flare and create better contrast in your photos, specially on hot sunny locations

Back Up

Remember to back up everything you shoot at least twice. If not you run the risk of losing your images.

Get involved

Aim to be part of your photographs specially when you are photographing people.Get them to react and relate to you and your personality and you will find creating unique pictures comes easier

del.icio.us Tags: ,,

Portraits and Festivals

Portraits and Festivals

  • Language barriers can be overcome with a good phrase book
  • Show the peopel you just captured their image on the LCD screen
  • Children are especially eager to become the start of the screen
  • Make sure to know the settings on your camera, dont waste any time fiddling with your camera while trying to take somebody's picture
  • Getting the right background is key to a successful portrait, make sure you dont include clutter that could take away from the focus point of the person
  • Fill the frame as much as you can with your subjects face and ensure the best angle of light casts evenly across your subject. Using a wide aperture of f2 of f5.6 will throw the background out of focus to flatter the main subject
  • If you are unable to gain eye contact with your portrait subject, then candid shots can prove just as effective
  • Using wide angle lenses enables this to be captured on camera -the person will remain the central focus, but the details of what is going around him or her will add a story to the scene somewhat verging on the photojournalist style, and will lend human impact to your pictures

Singer

Tips on...<Travel.. creativity>

Heading off the beaten track is a guaranteed method for limiting your chances of cliched travel images, but remember that in this day and age you would have to be very quick to snap something that hasn't been photographed.

Boosting creativity

  • The use of unusual perspective is an obvious option for boosting creativity. Getting down low with a wide-angle lens of 24-42mm will give an extreme edge to any landscape, as will using a fish eye lens which will work to distort the trye dimensions of the scene in front of you
  • Timing of photography is another key factor in determining the result image. You could for example wait for what is assumed to be a remote untouched location to become swamped in rush hour traffic and then shoot for impact.

In detail

  • Homing in on small details is a superb stylistic point in man travel photography portfolios, whether it happens to be the people, a street sign, local craft product or something that springs to your attention just as you are about to the press the shutter button. Something as simple as a door knocker, a plate of food or even a ceramic tile provided it is photographed well and in focus, can reveal a lot about a different culture

Exotic Landscapes

Tricks of the light

  • If you are traveling anywhere near the coast or desert, the exotic idyll of white sands and turquoise skies although photogenic will present the photographer with a multitude of hazards. They key is to be aware of the suns position.
  • In locations where cloud cover is sparse, intense sunlight will be detrimental to the level of detail in your image.
  • Adjust EV compensation up by one or two stops, or use exposure bracketing to cover yourself against inaccurate metering in tricky lighting scenarios
  • Early morning light is perfect for highlighting contours and textural formations of a deser landscape, emphasized even more by a low shooting position and wide angle lens
  • The low position of the sun and quality of natural light later in the day will give shots an atmospheric appearance, casting long shadows and adding depth to scenes such as rock formations and layered landscapes. Landscapes will also take on a warmer color tone at the beginning and end of the day, compared with the cool blue cast of midday

Wide Open

  • A standard wide angle lens at 35mm equivalent focal lent of 43-60mm or a super wide angle lens of 24-42mm will work to capture every last detail while making the most of the sjy and foreground
  • Place the horizon in your frame according to the interest that the sky and foreground each hold - they must wor kwell together or not at all-

For coastal areas

  • Using fast shutter speeds higher than 1/250 secs will freezse the motion of waves and sea spray. In contrast, slow shutter speeds of less than half a second will blur the water and soften the scene. If this is where your traveling interest lues then the addition of a polarizing filter to your kit bag will help you improving the color and contrast of your images, and will reduce the glare caused by reflection. A tripod is a most on all of this situations
  • The inclusion of a human element into a typical landscape photograph can give a striking sense of scale to a place. Focus your lens on the person in the frame, but employ a wide aperture to ensure sharpness from front to back.

del.icio.us Tags: ,,,

Tips on...<Travel>

Travel Photography tips

Is good to go to a location and have a them around the photoshoot. Get an assignment

  • Working hands
  • Colorful
  • Street names
  • Vivid Colors
  • Close up Local architecture
  • Children
  • Keep it friendly when approaching people
  • Know when to back down. dont be upset by a refusal, just try somebody else
  • Learn the lingo:: learn a few basic words from the language of the country you are visiting, at least please and thanks
  • Understand the culture: research into local customs
  • Fill the frame: get in as close as possible to the subject
  • Research your destination thoroughly, if you get some research done it will tell you what kit to bring
  • Make the light work for you. Bring a reflector/diffuser kit and a flash with a diffuser. Controlling the light is key for a good portrait
  • Know the best time to shoot: Avoid harsh sunlight if possible move the subject to the shade
  • When shooting wildlife, preparation is key: Bring the longest lens you have
  • Consider composition carefully. Dead Center is deadly. Position the subject off-centerfor a more interesting composition
  • Experiment with filters: Use a polarizing filter, to reduce glare on water and foliage
  • Ask permission to take pictures of people:
  • Change your perspective, tell more of the story by using wider lenses.
  • For more marketable pictures, try writing, it helps selling a set for a certain location
  • Create a diary of your travels, this will help tell a story of your set

Checklist before you go...

  • Do your research: read upon the area for things to shoot where to go and where not to
  • Check your documents
  • Equipment list
  • Clean Equipment
  • Check equipment (take a few test shots)
  • Charge batteries
  • Power (dont forget a travel adapter)
  • Check airline restrictions for carry-on on passport and electronics
  • Storage; enough memory cards and back up units in case those cards fill up

Think Kit

Make sure you pack the right equipment. Think about these filters, lenses and cameras to suit all the photographic situations you might encounter. A circular polarizer is a most

Outside the box

Capture not only buildings and locations but the locals while on your travels and you will have some outstanding shots

Add context

Although some shots look like they could have been taken anywhere in the world, make sure your shots dont. Add subtle touches like a local language sign pr native animal to your shot to give a little context

Zoom In

Great travel shots arent just sweeping vistas and huge buildings. Get up close and shoot individual hieroglyphs, single crucifixes or sained glass windows

Colour composition

Take advantage of local dress, landmarks and culture to take striking photos.. The rules of composition still apply, but you could try to vary your viewpoint to get more exciting frames

After dark

Wait until the lights go down brefore you get your camera outm Dusk and sunset hours are beautiful by the water. Look out for reflections, slow your shutter speed.

Local people

Landscapes may be the most common travel shots, but the ones if local people are often the shots that speak the loudest. Make sure you ask permission to take their photo

In the wild

Invest in a good telephoto lens as well as abean bag. Its essential for a safari

Do your research

Find out everything you can before travel. What events are going while yuou are there. Are there any high vantage points to shoot from?.

Research what your destination has to offer and what makes it unique. Research travel brochures it can give you a good indication of whats been shot, so you dont repeat it, but it also is a good start

Find out of any festivals as well as where the local markets are, this creates a huge opportunity. If you want to add some portraits to the mix, learning some of the local language helps

Ideally you should carry 2 DSLR bodies and with them a collection of overlapping lenses a telephoto, tele-zoom and two wide-angle. Keeping lenses to a minimum will mean less switching and less risk to your sensor getting dirty or damaged.

For shooting on the move a good back up unit is essential, there are several at different prices, I personally own this one. Some extras to pack on your bag are a tripod (carbon fiber would be ideal), cable release, USB cables and spare memory cards. Graduated filers could be consider a luxury if you want to travel light as some of this effect can be recreated in Photoshop

Tuesday, August 26, 2008

Tips on...<Underwater Shoots>

Develop basic diving skills

The most important thing is buoyancy control,the ability to hold yourself steady on a floating position

Shoot upward

Photographing from below a subject makes it look large and real,shooting down makes it look smaller, and it can get lost on the background

Shoot close

Twenty four inches is an outside working distance. Water can suck up lighting, flash falloff is much greater underwater

Shoot for small reflection in the eyes

Catchlights are important for any wildlife photography but underwater are more important for dimensionality

Choose a place and subject and work it al ot

It can take many attempts to get a single good shot

Respect your subjects

Tips on...<Panning>

Select a location

You want a location that offers a relatively homogeneous background bnut not a solid color. A bald white sky wont show paning streaks.

The background can be a hue of colors with a dominant one or a mix of colors, but look for a palette that contrasts with the subject

Avoid isolated vertical objects such as telephone poles, with vertical energy that will break the flow of the panning

Select a position that allows the subjects line of travel to be roughly parallel to your cameras imaging plane

Use your whole body

Start by aiming your feet where you think the pan will end. Next from your hip, twist to point toward the oncoming suvbject. AS your subject passes by simply unwind around your body's center of gravity. Panning happens in the torso, your arms, wrists and hands are stationary.

Hold the camera level and as tight in as possible, don’t move your feet.

Practice untwisting in advance, and as your subject approaches try to pick it up before opening the shutter

Set the shutter speed

Its critical to use shutter priority or manual,. Shutter speeds can range from 1/125 down to 1/8 secs depending on the speed of the subject. The slower the shutter speed the more dramatic the shot but also the fewer successes you will get.

For cycling 1/15 or 1/30 should be good.

Set an ISO that provides good exposure at one of those speeds.

Turn autofocus off

Prefocus manually on the subject's mark

Shoot in continuos mode

Fire off as many shots as possible during a single pass of the subject

One reason to use manual instead of shutter priority exposure is to ensure that the exposures in these sequences will match

If subjects are still not sharp here are some other tricks

Set a higher shutter speed

Hold the camera tight bracing your elbows against your body

If you use a wide angle lense and get in close to the action you will increase your chance of success. Also both to sharpen and to open uo your subject, pop a flash

Tips on <Food Photos>

Have a theme

Food photography is just as seasonal as food itself. Its important to map out a story of the presentation of the food that includes season specific colors, textures, ingredients and utensils

Bring options

Bring extra accessories to see what works best with the theme of the sroy. Play a lot on the set such as a white napkin, soup cups, etc

Keep it simple

The more complicated youtr set the more things can go wrong.

Backlighting glass

Clean white backgrounds help to illuminate glass without direct lighting. If you don’t have any studio lights shoot in a bright white room during the time of day that gives you the most light

Set the white balance later

Is easier if you shoot RAW and then play with the balance settings during your workflow.

Food is staple ingredient in every home, and has the potential to quell even the most ambitious home photographers hunger for truly sumptuous shots. From fruit or veg, meat to sweets, glass to earthen ware that range of texture, form and color is without a doubt infinite

  • Careful panning is the most important factor in any successful food study. The subject matter must be fresh and thoughtfully placed with attention focused equally on background space and lighting techniques. In many cases, window light will provide the most natural effect for delectable subjects, and is common choice for food photography professionals as they provide shifts with even soft light
  • Using a simple home studio setup will provide you with enhanced control over your shoot. Flash is more predictable than natural light and can be used any time of day.
  • Whichever method you can choose start off by using just one type of lighting in order to keep the final shot clean. Backlighting a still life subject is one method that the pros swear by, but be sure to use reflectors to balance the distribution of light
  • With your lighting in place, it is important to setup a tripod in front of your subject, Aside from reducing camera shake a tripod will prove invaluable as static point that can be referred to when you are making adjustments.
  • Finally watch your timing, Edibles will wilt under hot lights and freshly cooed food will only appear wholesome for a limited time.


Tips on...<Reflections>

Reflections

Find them everywhere

The strongest reflections come when a relatively low angle of light strikes directly on the object being reflected, not directly on the reflecting surface. But side-lit reflections give you nice gradations of color, especially with a blue sky and backlighting creates moody results in a limited color palette

Be flexible

A reflection doesn't have to be crystal clear. Muted reflections (sucn as on dishes or polished wood) make great abstractions

Focus into the scene

To preserve the texture or detail of your reflecting surface, focus in about 1/3 of the way. What the surface to be a perfect mirror? Set the focus top infinity

Bracket

Especially in early morning or late afternoon when there can be huge contrast between the lighting of the reflecting surface to its reflection

Use Aperture Priority

DOF can be tricky So set an f/stop that gives you as much or little DOF as you need and let this dictate the Shutter speed

Go Wide

Stymied by the DOF? Use a wide angle lens, DOF is less of an issue and you will have more in-focus latitude

Read right

To correct reversed type use image editing SW to flip the image horizontally

Think Manual

To get both the reflection and reflecting surface (i.e puddle reflection and puddle edges) in focus, switch off AF and manually set your lens to the hyperfocal distance. The point of focus that jeeps the creates range of foreground in focus trough infinity.Stop down your lens with DOF preview button. Focus on a foreground object then move the focus further away until the background point just comes into focus.

Keep yourself out

Wear dark clothing and cover shiny camera surfaces with black gaffer's tape to be as unobtrusive as possible to the shot

Cant find a reflection

Make one. Carry a compact mirror and you can always create reflection image.

Tips on...<Guide to the Eye>

This principles are based on eye studies that you can take advantage for more compelling pictures

  • The slowest film you can buy is ISO 25, with DSLR's going npw tp ISO 6400 your camera sees better in the dark than you do. So enjoy this functionality and go shoot in the dark. Dont be afraid of some noise
  • The eyes love lines, especially horizons. Use them to your advantage, keep lines straight include points of intersection, and put your subject close to corners
  • Avoid bright pupil contracting lights in the eyes when shooting portraits, or score some belladona
  • Place someone or something moving to the right in the foreground (perhaps a couple walking on the beach) and in the background above their heads place objects projecting to the left such as cliffs and headlands)
  • When shooting B&W make sure you have enough contrast to keep viewer's attention where you want it. And dont forget those all important lines and faces
  • Use split ND density filters in sunshine and high dynamic range photography at night to make your pictures look more like your actual experience of the scene.
  • With a focal length of about 22mm and a field of view of almost 180 degrees at its extreme our eyes are capable of f3.5 wide open. Then, only the 2 degrees in the center of the retina an area called the fove us sharp. This is maybe why shallow DOF is very appealing. So use it to draw attention straight to your subject. Extreme DOF can also introduce elements of surprise to your photo
  • When we view pictures our brains can identify and make associations with a range of blurry and indistinct elements, essentially filling the blanks due to the fact that with a 120 degree vuew field of view the eyes resolution is around 576 megapixels.
  • Studies show that 75% of the most appealing paintings across 3 centuries showed a light source above and left.

Tips on..<Animals in Action>

Have patience

Eye contact

  • Good eye contact helps the viewer to make a connection with the subject, adding impact
  • Whenever possible try to get at same eye level of your subject
  • Make slow deliverate movements to ensure you are not perceived as a threat and wait until you see catchlights in the eyes

Panning

  • Convey the feeling of speed as your subject runs or flies by your sreen
  • It will take practive, start by a shutter speed of 1/30, 1/125 seconds)
  • Prefocus on the sport where the creature will pass in front of you and fire the shutter.
  • Your settings will need tweaking according to the lighting conditions speed of the animal.

Relieve stress

  • Make sure you give the animal time to relax, such as dogs. In case of dogs, let them be dogs before you start shooting them, play around with them
  • Once you begin if it begins yawning lor laying down he is showing signs pf stress and just needs to be a dog again.

The right lens

  • Go for the fastest lense you can aford
  • Image Stabilization either on lense or camera can make a big difference
  • In some situations a monopod can help achieve sharp shoots
  • If you can justify the cost, a prime lense offers unrivalledmimage quality and sharpness

Be invisible

  • For cerain species that are hard to capture, weate quite clothes in natural subdued colors, steer clear of perfurmed soaps and lay off afteshave the day of the shot
  • Use bushes and trees for cover or invest in scrim netting to drape over you and your camera, disguising your outline

Add water

  • Any body of water can make great aditions to your photographers acting as a foreground interest or prodiving a reflective surface to add another dimension to your subject
  • Calm water often works best for reflections of wildlife.

Aperture

  • A fast aperture may be necessary in dim conditions in order to maintain image sharpness, but shooting with your lense wide open generates a shallow DOF, recommended is at an f/8 to allow plenty of light to nter the lense as well as to create enough separation Boost your ISO slightly so u can still shoot with a fast shutter speed.

The right light

  • The midday sun flattens fitures and reduces contrast so is better to stay until the sun hangs lower.
  • If you position yourself correctly, you should find that this creates dramatic, high contrast lighting, with deep shadows cast across the landscape.
  • Capture your subject in full sun against a shadowy background and you have a recipe for a moody spectacular show

Freeze the Action

  • Some actions can look great when frozen completely but be aware that this mean you lose some of the drama. This is a good approach when trying to capture a decisive moment. Such as the apex of a horse jump, a cat jumpng filling the frame, try 1/1000 sec shutter speed

Flash

  • Sometimes a burst of fill-flash can make a real difference to your shot, lifting your subject out of the shadows or simply adding a glint to their eyes.
  • You are not using the flash to illuminate your subject entirely, merely to fill in some of the harsher shadows and inject some life into your photo, so dont over do it. Always be aware of your subjects disposition; if they are nervous its not worth the risk of causing them stress - find another subject.

Filters

  • A soft focus filter can work really well for some subjects, particularly when ytou want to add a warm glow or soft nostalgic feel to the image. This filter doesnt cut the amount of light entering the lens, so you can use it without affecting your exposure settings. It also works really well with light subjhectsm bathed in sunlight.
  • An ND grad is essential for balancing compositions with dark subjects agaunst bright backgrounds and a ND filter helps to cut the amount of light entering your lens allowing you to extend your exposure time without overexposing the image

Blur the action

  • Sometiomes a more abstract approach to photographing your moving subject can yield a very pleasing shot. Mount your camera up on a tripod set the shutter speed of 1/8, 1/2 secs, predocus on a point that your subject will pass and fire the sutter just as they sweep past your lense withou trying to track them, the result should be a colorful blur of movement across the frame, capturing the speed and drama of the animals movement. You can vary this technique by panning the camera slightly to achieve an overall blurred effect, but still retain some of the subject's distinguishin feature.

Autofocusing

  • For some subjects select a single central focusing point, but this doesnt always work. The solution is to select several focus points around the center so even if part of a wing crosses that rectangle of points the AF mechanism can lock onto it. This can be a very useful way to accurately tracking the fast moving birds by using continuos auto focus.

Birds in flight

  • Its best to set to either Aperture, or Shutter Speed, set your ISO according to the light conditions.
  • Use a shutter of around 1/500 seconds to freeze the action but a little bit slower would show a very interesting movement in the exposure
  • Ensure you are using burst mode on your camera

Monday, August 25, 2008

Tips on <Street, Candids>

Less is more

In terms of equipment less is more. If you are traipsing the streets of a city for hours on end you'll want to cut down on the baggage so a good pair of walking shoes and a comfortable camera strap should not be negotiated. Additionally youll want to blend in to catch subjects unawares; erecting a tripod or using a telephoto lens wont suggest sublety

Off the beaten track

Street photography is not tourist photography, so go off the beaten track and capture what us being done behind the scenes. Goung out an an unusual timecan help you find great shots and because street photography us nit dependent of perfect light settings, you have no excuse not to get out early and say out until late

Stolen Moments

The key to successful street shooting us to be on the lookout for an opportunity before it happens. Anticipate action by scouring groups of potential clashes or bonds, judge the atmosphere of a crowd and react to the body language and facial expressions

True Colours

Colorful clothing or backgrounds can sometimes be a distraction when you want to concentrate on facial expressions and gesture, and for this reason the genre blends itself to black and white. However, there will be opportunities where lurid and gaudy colours collide and it would be a crime to convert to B&W

In the background

By paying attention to the background, you can catch some stolen movements, Look for billboards. signs, graffiti or other visual elements that could be used to make humorous, ironic or incongruous statements

Dare to go diagonal

Exploit the diagonal lines and perspectives of the urban architecture. By playing with angles and available geometries you provide force and dynamism and a kind of harmony between the man and the urban architecture

Opposites attract

Look for compositions that reveal dichotomy to build a story or challenge and assumption. Try splitting the composition between the reflections on the ground and the scene above or capture part of a building half i nthe dark, half in the light

Performance

Street entertainers make ideal subjects, but try to capture from a different viewpoint, Wether its a parade, buskers, free runners, skateboarders, or breakdancers they offer something a little different to your average street scene. Experiment with your compositions and choose a high shutter speed to capture the action

Off the Streets

Despite its name the genre does lend itself to other recreational areas especially those where people expect cameras to be present. Seaside, fairgrounds, parks, zoo, sporting events or the zoo

New angle

Get down low or find a higher viewpoint for an unusual angle. Multi story car parks are great for this, as you dont have to shoot through glass and give a viewpoint in town centers. Be careful that your camera is secured; the last thing you want is to drop your camera and hurt someone.

Practice makes perfect

With your camera pre-set pick a spot on the street and proceed with calmness sesitivity and poise. With practice you will make great street photographs

Fortune favors the brave

If your pictures arent good enough, you are not close enough. Shots taken in the thich of the action will draw the viewer in. so force yourself to press the button and prepare to deal with the consequences, Better that than regretting missing an opportunity that will never happen again

Fun in the Sun

Use the sun's glare ti your advantage. When the sun is low in urban environments it produces long shadows and shafts if light, creating high contrast patch works, This can trouble a camera's meter. so make sure you use the manual mode and expose for the highlights

Ready to pounce

The opportunity for a great shot may be fleeting so be cued up and ready to shoot. Have your camera out, finger at the ready and for when the situation demands, matrix metering and autofocus activated

Revise and Revisit

If you see a scene that has potential dont be afraid of revisiting the same location and spend some time there to get a better shot. Revisit in different weather conditions and different times of the year to see a change

Frozen motion

Movement is a key part of capturing the human zoo. Keep shutter speeds fast and at hand steady or find something to support your camera. To capture people moving across af rame a minimum of 1/125 sec is recommend and an ISO not slower than 400

Street wallpaper

I prefer it if my subjects don’t know Im there, or else are too busy to be aware of my presence.

Life trough a lense

Exaggerating perspective will help set your subject in context and provide am more forgiving DOF thats why most street photographers say a lightweight wide angle lense is their weapon of choice Also consider fisheye lenses and the potential of panoramic shoots

Expect the Expected

People are generally more suspicious in today's social climate, which makes street photography a potential minefield of hot-tempered confrontation. Try shooting subjects in places where people expect shots to be taken, but be aware that you may be regarded with suspicion, Smile, be polite and be willing to delete images if the subject asks

Location, Location, Location

Places where people interact with one another are a prime target for street photography, street corners, pedestrian crossings, outside piublic houses, bus stops, woekers puring into the streets at rush hour, etc. As crowding increases people's personal space decreases allowing you and your camera to get much closer.

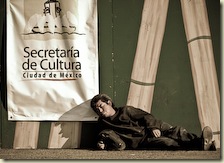
Sign reds... Ministry of Culture...

Taking a nap

Tips on <Shoot UK Locations>

del.icio.us Tags: ,,,,

Ireland/UK ideas

A good place to look for ideas and good location in these areas are:

www.nationaltrust.org.uk

www.bbc.co.uk (Go to Science and Nature pages)

Lincolnshire coast between October and January. Seal pups can be seen in November

Best UK Locations (scenery)

Scotland

  • Glen Lui, Cairngorms
  • Bay of Laig, Isle of Eigg
  • Silver Sands of Morar, North West Highlands
  • Loch Achtriochtan, Western Highlands
  • Loch Ness, Western Highlands
  • Eilean Donan Castle, Dornie
  • Talmine, Northern HIghlands

England

  • Burnham-on-Sea, Somerset England
  • Durnstanburgh Castle, Northumberland
  • Bamburgh Castle, Northumberland
  • Castlerigg Stone Circle, Cumbria
  • Howden Dam, Derbyshire
  • Stow-on-the-wold, Gloucestershire

Northern Ireland

  • St John's Point Lighthouse
  • Mourne Wall, Mourne MOntains

South England

  • Portland Bill, Dorset
  • Corfe Castle, Dorset

East and South East

  • Turf Fen windmill, Norfolk
  • Brograve Drainage Mill, Norfolk

Wales

  • Nash Point, Glamorgan
  • Pen Y fan, Brecon Beacons
  • Pentre Ifan burial chamber, Pembrokeshire

Tips on..<UK Shoot Ideas>

Coastal Wildlife (UK/Ireland)

  • Wear appropriate clothing
    • Outdoor clothing should be both waterproof and windproof, as well as of colors that will blend in with your surroundings. I prefer to wear several layers, so that body temperature can be controlled
  • Use a Tripod
    • Use a a spirit level or look through the viewfinder to check horizons to make sure they are level.
  • Check tide times
    • Be aware of the time, what the tide's doing and be vigilant
    • You can buy tide tables for the area you are visiting, or go here. In summer, always check if times are corrected for BST.
  • Protect your kit
    • Use protection against sea spray on lensens and on camera bodies
  • Check your exposure
    • Look at your shots with the LCD as you go along to make use of your histogram
  • Be careful around steep cliffs
    • Its easy to step off teh edge when looking trough the viewfinder also remember you dont have to go far to lose cell reception
  • Do not approach seals on the beach
    • Pups may look cuddly but they have sharp teeth, and the consequences of a seal bite can be very unpleasant to say the least due to the bacteria they carry
  • At sea, use license commercial boat operators
    • If you are on a provate boat when approaching marine mammals and seals, follow any marine codes for the area. Also remember its an offence to cause deliberate or reckless disturbance to animals such as dolphins.
  • Recommended equipment
    • UV Filter.Protect from sand, wind and salty water
    • Linpix Photographic mat: Perfect for laying on sandy beaches, muddy places. This mat is lightweight, waterproof solution thay folds down small and can be hooked onto your camera bag when is not in use
    • Long Lense such as the Sigma 150-500.
  • Try shooting in Manual or Shutter Priority Mode. 1/500 sec will alleviate problems of camera shake

del.icio.us Tags: ,,,

Tips on...<Birds>

Practice your stand

  • Legs parallel to shoulders
  • Elbows tucked on the side
  • Rotate Upper Body
  • Use sequence shooting
  • Predictive autofocus
  • Study the behavior of the bird if possible
  • Give it space to fly into the frame
  • Select one AF Dot change it depending on where to frame subject
  • Afternoon shots are better
  • If against a bright sky increase the exposure level
  • Dont be afraid to increasr the ISO
  • Dont forget to rotate the polarizer filter to see perspective

Become and observer then a photographer

  • Get field guide for your area, learn about bird migrations and season in your area
  • Learn their behavior, birds are creatures of habit, you will be able to anticipate their moves after a while

Start with larger, slower moving birds

  • Start with sea gulls and herons, master this and then you will capture smaller faster birds

Use the right gear

  • Start witth a small lense 400mm 5.6, Get a fast focusing SLR and as you get more into it, spend the money on better lenses
  • Dont use a tripod, or get a tripod with a special head specifically design for bird photography (runs around $400.00)
  • Shoulder stock can help steady the camera
  • Image Stabilization either on camera or lense will go a long way

Get in position

  • Spread your feet at least at sholder width to give freedom of movement to follow trough the viewfinder
  • Hold the camera firm but relaxed grip
  • While panning avoid sudden, erratic movement. Keep it smooth and dont stop even when the shutter releases

Follow the birds flight patter with your eye not the viewfinder.

  • Oftem aim slightly ahead of the subject, depending on speed
  • Always have the camera turned on and in position, a fly-by can happen any time

Set your exposure

  • FOr birds in motion the best is manual expisure
  • Meter for the subject and it will be exposed properly. For begginers start with Program mode and bracket until you get the hang of it
  • In Manual mode use partial or evaluative metering to get a light reading from the subject.
  • Shutter speed is vital, go for 1/1250 or faster with ISO of 320 or 400

Use autofocus wisely

  • Most high-end DSLR have a continuos autofocus. With this function you press the shutter half way and the camera continually calculates where the sub ject wull be adjusting the focus as long as the subject sytays in the autofocus area of the viewfinder. This is by far the best way to focus when you are shooting birds in flight
  • Use the center AF only this is the fastest and best way to obtain focus on the bird's eye, specially for larger birds. For smaller, faster mioving bird you can use multiple focus pointsm this will allow the camera to choose an AF point from an array covering a wide area of the frame. Multipoint focus works well on solid backgrounds such as blue skies but doesnt work effectively on varied backgrounds like grasses and trees

Consider the sun and wind

  • Sunlight is crucial. Later afternoon an early morning are good times to shoot.
  • Have the sun behind you at all times with the subject in front of you.
del.icio.us Tags: ,,

Tips on...<Dragonflies>

  • Monitor how a dragonflie behave, they stop once in a while to catch sun rays, so check weather to see if it will be sunny that day
  • Dragonflies react to movement, look for a sunny spot on a flower and wait motionless, they will get close to the camera that way.
  • Late afternoon is the best time, as well as an abscence of wind
  • Use a macro lense makes sense but also an extension tube could be necesary
  • Manual focus is the way to go.
  • Pre-focus manually and move the camera to and from the subject.
  • Shutter Speeds at 1/80 with a 50 mm lense and ISO 400
  • Bring insect repellent for mosquitoes
  • Infrared beams can help to cut down on the wait
  • Set the camera to burst mode as well.Expect a low success rate, a professional gets 1 out of 30 shots.

Tips...<Airshows>

  • Airshows can get crowded really quick, for the planes on fixed exhibition try different angles to crop people out of the shot
  • Helicopters look better when are shot with a land reference, otherwise they look fixed on the sky as if they were hanging from a thread
  • For jets panning is enough to show movement, but with propeller getting the sense of movement is hard. Get a Shutter speed of 1/320 secs to get that
  • A monopod can help but with a very good swivel head
  • Heat Haze coming out of jet airplanes can create a very good effect on the background
  • Airshows are very dusty so be careful on changing lenses. Is best to set your camera once and not have to change lenses in this environment
  • Bring sunscreen!!! next to the runway there is no shade
  • Look at any information on the airshow before hand, what kind of airplanes will be shown on the ground and what are the airshows
  • Plan your cards and space, you can spend hundreds of pics at the beginning and as the day progresses you could run out of space. I spent 16GB of space on 4 hrs at McChord Airforce Airshow in Tacoma, WA, USA

Example of propeller with fast shutter speed, other than the smoke no sense of movement

425@423_33d8deb7d12b044af4b427c8b9331777

At 1/500 some blur can be seen on the propeller

427@423_fd59e281130ac2abf434ed140dd1d4ef

Different angles to eliminate crowds around the airplane

431@423_d9300960d52928be520c70fe3288d8d8

Tips on...<Shooting at a rodeo>

  • Start by attending small-town rodeos. This will let u in get close and personal, as close as the arena fence. Having good day light si critical for high shutter speeds and high ISO
  • Set your camera for continuous focus and ensure you use most or all of the focus point on your camera 11 on the E-3
  • Use a fast telephoto, something around at least 300mm, but not so big that you can hand hold it. It can cover most of the arenas (Regular rodeo arenas are 2/3's the size of a foot ball field)
  • You might have to increase the ISO to ensure you can keep camera shake so 400 in full sun you can shoot at f/8 at 1/1000 of a sec. If your camera can cover 1600 then you can go to f/111 at 1/2000, this way you can ensure that you will still get a sharp shot in the case your camera's autofocus was focusing on the bull's nose and not on the rider's/
  • Sometimes the noise grainess on the shot if processed correctly can look very good for rodeo shots
del.icio.us Tags: ,,,,

Tips on...<Cricket>

  • Bring a tripod and teleconverters if available
  • Start by setting the lense first, then the converter, then the camera
  • A tripod makes sense as cricket has a lot of stops on the game, and gives you the ability to move around
  • Positioning parallel to the wicket will allow you to get some cool blur shots of the crowd
  • If playing Twenty20 then you get the advantage of having color uniforms and colored wickets which make it easier to stand out
  • Depending on where you are positioned, spend some time with each type of player hoping they make a play, spend some time on the bowler, the batsman or hoping a fielder makes a catch
  • Some great and classic shots are of those at focusing at the wicket, the batter gets bowled and wait for the bails to fly out up in the air.
  • Arrive early on the game, a tripod or monopod should be required.
  • Pay attention to the background as there will be lots of crowds and make sure the color doesnt interfere or makes the focal point gets lost
  • Be ready for every ball. there is nothing worse than missing a ball and realizing it would hae the best shot of the day.
  • Concentrate and try to anticipate what is going to happen. If the batsmen are runing quickly between the wickets then try focusing on the wicketkeeper in case there is a run out. If the ball is hit high in the air try to get a photograph of the ball being caught or dropped by the fielder
  • You will need a long lens for cricket. A 400mm is probably the shortest lens that u can get away with. The action will always be 60 to 80 yards away/ Converters are a cheaper way to get this done
  • Look around you, there might be a good picture away from the field. Children watching, old men sleeping, people in the scoreboard.

Tips On..<Animals at Zoo>

  • Bring a long telephoto lense, and a tripod. If you have Stabilization on the camera or lense could let u get away from the tripod
  • Remember that if you bring a tripod turn off Stabilization
  • There are 3 types of shots
    • Wide angle shots that show the animal with the environment
    • An animal portrait that fills the frame with the animal's head
    • And a single animal aspect, like a paw
  • Try to get animals showing movement, are more interesting than the animal doing nothing
  • Also, try and find a position where it doesnt give away that you are on a zoo, such as fences, people, posts, etc
  • Getting ready of cage wires
    • Select Aperture priority in combination with a wide aperture
    • Move as close to the fence as u can
    • If any parts of the wire show up in a way of "fogging" increase the contrast in post production and this should fix the problem
  • Shooting trough glass
    • Eliminate reflection if you are using flash angle tis at 45 degrees to minimize the amount of light that will bounce back at you
    • Take the lens hood off if u are not using flash and shoot with the front of the lense pressed against the glass, reflections should disappear, make sure to have your UV filter on to protect the lense
  • Focus on the eyes of the animal, if the animal is interested on something and following with its eyes you can get a great show of its eyes when is targeting something
  • Talk to zookepers, they will give you great information o when an animal is most likely to be moving or in action.
  • Understand animal behavior it will give you a heads start on movements that the animal will make. (i.e walking around a cage, drinking water, etc)

Get close to the animals.. even the scary ones:

Singapore Jan 08-3084038-1

Try to make your shot as close to wildlife as possible, avoiding posts, fences, and wire

OLYMPUS DIGITAL CAMERA

Tips on...<Butterflies>

Choose the right time of day

  • Trying to shoot buttterflies on a warm sunny day when they are the mist active will be a difficult and frustrating task. Its much easier to shoot them in cooler conditions early or late in the day

Pick the right weather

  • The most important is the wind, or rather lack of it. Even if the butterfly manages to stay still the grass will cause it to move so much thay it will be impossible to get a sharp picture. Look for still, calm conditions

Advance Slow and Steady

  • Once you have found your subject dont get close too quickly, butterflies can detect changes in air pressure and take flight.
  • Always approach it slowly and avoid sudden moves. Leave your bag on the ground nearby.
  • Dont move the surrounding vegetation too violently.

Watch your shadow

  • Before you approach the butterfly try and predict where your shadow will be. If the sun is behind you and the shadow falls over the butterfly, most likely it will take flight. In cold conditions you ccan still get away with it because they will be tired.

Wear natural colors

  • Best to wear dark, natural colored clothing if you want to get as close as possible. Avoid bright colors such as red as they can pick more movement that way if you are wearing them.

Do photograph butterflies in flight

Airborne they convey all the magnificient form and color byt also the graceful yet improbablr means of flight

Dont shoot in the shade

Direct sunlight allows the fast shutter speeds and small apertures you need to freeze motion and render color

DO use a fast focusing high magnification lens.

Dont use a close focusing lens.

Butterflies spook if you get too close, so you need glass that provides highest magnification at distance no closer than 3 feet. If your lens forces you to get 3 inches away to fill the frame, move to beetles

Do use a wide area autofocus brackets, or a similar full area autoselect AF mode so your unpredictable subject stays in focus. With flying creatures our "keeper" rate diminishes when we use single point AF

Dont chase butterflies,

let them come to youm sit calmy and watch a swath of flowers that has recently attracted butterflies, they will return eventually. Move slowly and you can shoot you your heart's content

Shoot in the morning. Usually butterflies spend their first hour actively nectaring to get energy for the day. These first hours which can be mid to late morning as they need sunshine sun and warmth to become active are the best time to capture them

Tips On...<Domesticated Animals>

Horses

  • Take advantage of a horse's elegant curves
  • A focal length of 50mm is ideal to a avoid distortion at close quarters
  • For a portrait style shot its better to photograph the horse's head in profile rather than head on, as its very hard to keep all of it in focus due to the size
  • Practice shooting a trotting or galloing horse using a smooth panning technique to blur the background. Remember to leave some space in the frame for your subject to move into

Action


To avoid camera shake you will need a shutter speed faster than 1/250.


Animal Farm


Always make sure that the animal's eye are in focus and allow sufficient DOF to ensure the nose is sharp too


Take advantage that you can take several shots of the same animal due to their confinement, so try different options


Do some research on your animals, investigate the best time to pay a visit. For example, most farm animals are most active close to feeding time, while excessive heat will force them to stay indoors or in the shade


Be prepared


Pets will get bored much faster than you think, dont put them infront of the lense until you are ready


Pick a suitable location with an uncluttered background.


Fish


If shooting gold fish on a pond, bringa polarizer to avoid reflections


Mount your camera on a tripod and bring some ND filters and try to capture some abstract images with long exposures


In aquariums bring a macro lense to focus on fish close to the glass using a rubber lens hood to shield from abient light


In AV mode set a wide aperture to allow your lense to gather as much light as possible, aiming to generate a fast shutter speed (1//250) A higher ISO sensitivity might be required to achieve sharp shots


Dim the lights in the room and turn off flash


Dogs


For shooting dogs or wolfs wait until its ears picked up and eyes open to catch it looking its best.

Tips on...<SportPhotography>

Right Kit

  • Get the lense with the widest aperture you can find to be able to shot in low light
  • Your DSRL should have a good burst mode measured in frames per second
  • Monopod makes sense for certain sports, otherwise it would limit yoour mobility on the field

Know the climate

  • If you are going to cold weather, keep your batteries warm to maintain battery life, having them on your pocket close to your body is a good idea
  • If too hot, bring water and sun screen, also if your bag has some deflective material use it to try to keep your equipment cool

Tell a story

  • Usually everybody focuses on an sporting event on the usual shots of the man of the match, the goal, the save and the victory, step out of the euphoria and focus on the losing team, defeat, frame their reaction against the celebrations, this will make you stand out from the crowd

Stay alert

  • Dont stop shooting after the action stops. Resist the temptation to start looking at your LCD screen, lots of humourus, interesting pictures can be taken when the play stops

White water

  • Scout the route before hand, spot the best location, try and do it while other people are practicing to see the difficulty levels.
  • Practice on your local water sports center
  • Bring a fast telephoto.

Keep your eye on the ball

  • If the sport includes some sort of object such as ball, javelin, or other try to shoot it in the context of the player, sports person to show some context
  • Try to predict the shot, prefocus on that area to get the shot.
  • In some events youy might have to trade off and shoot in JPG to ensure you can get enough shots of the action on those long burst

Know your sport

  • Learn the sport you are shooting, this will tell you where to locate on the field, when to change position, and when the dynamics of the game could change

Photograph spectators

  • Capture the enthusiasm of people on the bleachers
  • Look for die-hard fans dressed up for the match
  • Dont forget to check the crowd's reaction at key moments on the game

Invoke a response

  • Once you are mastering the technical aspects, but ensure you are ensuring your shots are creating an emotion on the viewer

Tips on... <Fire>

del.icio.us Tags: ,,,,

Basic Settings

Focus can be very tricky, one trick is to use an item close to the flame and focus on that

Use a small aperture to widen DOF and capture as much detail as possible

You can get away doing that hand holding the camera, but is much easier using a tripod

Keep it simple

In terms of composition its best to keep things uncluttered. The shadows cast by flames ca be a little difficult to counteract., and more objects in your shot will create more shadoes

The glow from candles and log fires can be invitating, so enhance this with a few props.

Including candles on a shot convey warmth, home feelings.Make sure to enhance this feeling with eartly materials like fruits, colors,etc

A good setting for this type of environment is f 5.6 and a shutter of 1./200 to begin with

Reflectors

Look for natuarally relflective materials in your surrounding environment. For example if you are taking a portrait of somebody on a table with a candle, adding a white tablecloth will increase the light that bounces back, difussing the hard shadows that can sometimes happen

Temperature

When shooting photos by candleliht be aware of the color temperatyre of the light they yield, so you can end up with the most accurate WB. A match flame burns at 1,700 degrees Kelvin, candlelight at 1,850.

Include night skies

If you are shooting outside using a wide angle lense to include some sky can yield interesting results. If you are workign 1hr before sunset you will see a good contrast of the deep blue sky and the orange of the flame. If you are doing late at night, this can cause an interesting red fiery sky.

Adding more light

If your setup looks a little bit dim, introduce artifical light, but try to avoud flash as it could ruin the warmth feeling of yout fire source. Try adding a small lamp that can be dimmed or a torch lioght that can be focused to certain areas of the exposure

Fire placement

Unless you want to create silhouttes you will need to place your source close to your camera, but putting it below the eye line it will create a spooky scene. Moving the light source close to the face at eye level will create a more smooth soften even light on the face

Occupational fire photos

A good opportunity to take advantage of fire, are jobs that work wih fire, such s a blacksmith or welder.

If you want to get shots of welding , setup the shoot before the welding commences, prefocusing on the work area, use a tripod.

Tips on...<Motorcycle racing>

  • Get a map of the race track and scout a location, get a program this will also tell you where fences are, corner names, overtaking curves, etc
  • Attend qualifying rounds, less people more freedom of movement
  • As raiders accelerate out of a corner bikes often lift the front wheel making for great shots
  • Fences along the trail can be problematic a good suggestion is
  • Set Aperture Priority an F8 or 10 on a 600mm lense and move the ISO to get the shutter speed sloe enough to capture movement in tires and disk brakes
  • Wait for the bike to arrive at the spot you have selected.
  • Try a different spot on the track so shots dont get boring and repetitive
  • Try your panning skills
    • Go to shutter priority
    • 1/125 and 1/250 secs shutter speed
  • Equipment
    • 600 mm lens
    • 70-200 mm lens (in case you are close to the action in the curves)
    • 1.4X teleconverter in case is needed
    • Monopod could be useful for added stabilization

Sunday, August 24, 2008

Tips on...Capturing DJ's at work (Dance club)

  • Include lost of subjects (A bouncer, bar staff, dancers, crowds and DJ's) fast food vendors outside.
  • Use an off-camera flash this will give you better directional control over the shadows.
  • Shooting people dancing
    • Each nightclub will have different lighting setups so there are no hard rules around this, here are some tips
    • Set your flash to manual sync at around 1/60 with an f 6.3. This works well when shooting a meter away from the crowd
    • From a longer distance, set aperture to f5.
    • For wide angle crowd shots raise ISO to 800 set to f5 and change the flash to sync to 1/30
  • Your pictures on a dance club should reflect movement and be dynamic, play with the flash setting to show light trails
  • Also your settings will be different on the dance floor from the DJ Booth. Remember if using flash the light will bounce now from the ceiling.
  • Shoot light trails, if you are shooting a dance club include movement on the shots by using longer exposures to add light trails. Use first curtain sync to freeze the image, after the flash try either rotating or moving the camera or zooming out to add some great colored motion

Places I've shot in