Friday, September 5, 2008

First "Photowalk" with my Zuiko 8mm

At last I was able to put my new purchase for lenses with my new backpack the Think Tank 360. You can read that review here.

As far as the lense goes, I really like it and I would defintely recommend the purchase of a fish eye as part of your kit.  Usually when I am having a photo only trip, I take 2 camera bodies with me. My Oly 410 and the Oly E-3. Most of the time I kept the fish eye lens in the 410 since I take advantage of the IS in the E3 for telephoto shots.

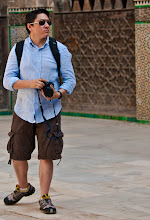
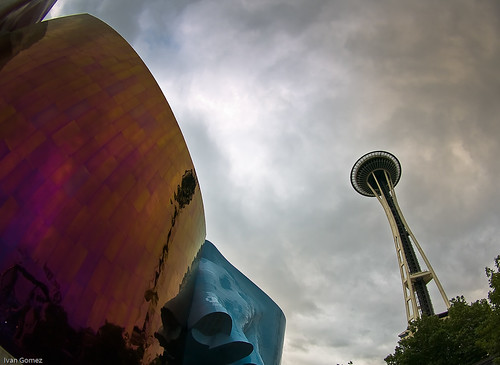
The most impressive thing about the lens is its sharpness and ability to capture lots of colors and dynamic range. I know this is also in due part of the body itself, but I haven't seen this tone range in any other of the Zuiko lenses. I guess it helps  that its a prime lens as well. Here is an example...

This picture only has a little bit of retouching in Lightroom 2. One thing to note is taking pictures takes a little to get used to. You have to mind ALL of the space around the frame, being careful on not to include your own feet, a friend standing next to you, etc. Its almost as you can take a picture of the back of your head with this lens.

One of the objectives for this trip was to "overuse" my 8mm just to get the most out of it. From now on, I will always carry this lense with me but it will be reserved for special effects, panoramas, and force myself to first work with my other lens and then close a spot with this specific effect.  I will try in the future to use this for panoramas to take advantage of the distortion or to fix it on Post Processing with the help of photoshop or PTLens . This lense if denitely not designed to replace your regular wide angle lense, but to bring out special effects and perspectives.

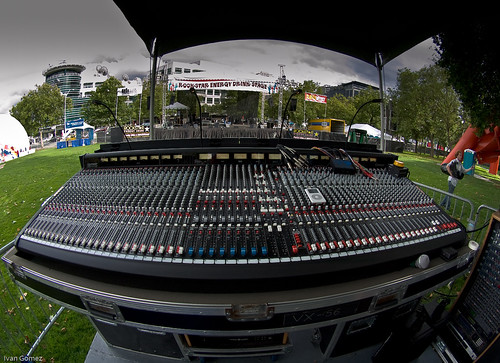
You can create different and eye-pleasing perspective with this lense, but one of the things I have learned is that with this type of distortion you really have to mind your surroundings and how you are standing in front of them, as all of this will get accentuated on the final exposure. Look at this example..

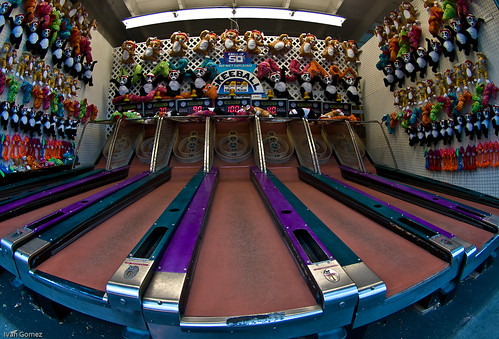
I should have stood right in front of the center of the middle lane, right now the picture shows an unbalance and an awkward distortion in the center lane, the parallel lanes and the pandas on the sides do not have the same level of distortion. Regardless of this, I think the colors were excellent

Here are some of the examples of the pics I liked and the effects you can manage..


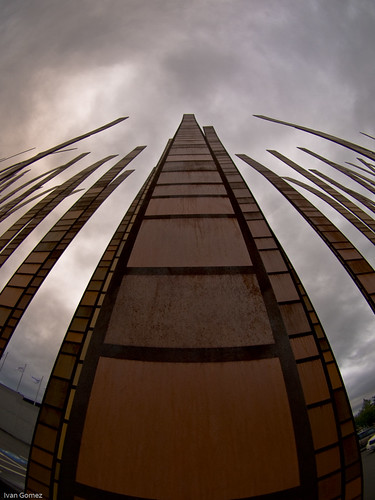
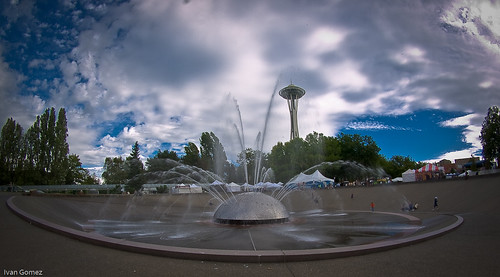
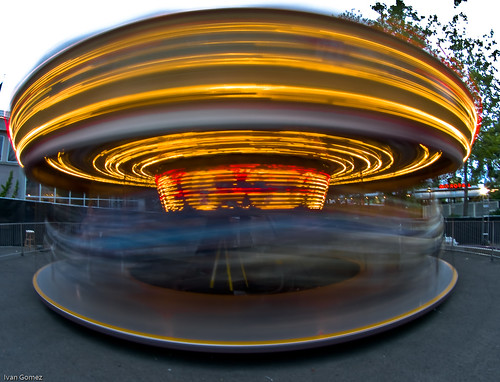
One of the things that really caught my eye was when shooting up to a structure, is amazing the amount of sky you can capture, this should lend itself really well for using HDR. (I will try this next time I am carrying my tripod). I then switched from my 420 to my E3 using the fisheye, IS helped me capture the carrousel movement by hand...

Overall I really recommend using this lense, I would love to try this on panorama shots with a single shot covering a large amount of space, then removing the distortion with PTLens and see what happens..

The entire set of this pictures is here...

Primer "Photowalk" con mi Zuiko 8mm.

Por fin pusimos a prueba de campo mi nueva adqusición en cuanto a lentes y mi nueva backpack para acarrear todo mi equipo. Si quieren ver un review de mi nueva maleta, veanla aqui (En Ingles).

En cuanto al lente, me gusto bastanto y lo recomendaria. Cuando tengo la oportunidad de llevar 2 cámaras, lo hago. Esta vez lleve mi Oly 410 y mi E-3. La mayoría del tiempo use el 8mm con la 410, ya que reservo el uso de la E-3 para mi telefoto aprovechando el IS.

Así fue como un amigo y yo nos lanzamos a las calles del Centro de Seattle a buscar varias oportunidades antes de que acabe el verano.

Lo que mas me impresiono del lente junto con la 410, es la nitidez de los colores y el dynamic range. Aqui una prueba que creo que refleja la habilidad del lente y la cámara para capturar detalles y una gran tonalidad de colores...

La foto solo tiene un poco de retocado en lightroom. Lo que si es que lleva un poco de tiempo acostumbrarse al lente, debido a la distorción que genera se debe de buscar algo que sea agradable a la vista, pero que tambien demuestre las capacidades del lente. Me llevaron como 10 intentos para lograr esta foto, estaba acostado en el piso y muchas veces tuve que reacomodarme para no mostrar mis pies.

Por otro lado, en esta sesión me puse como objectivo "abusar" un poco del lente para poder ver sus capacidades, de ahora en adelante siempre llevaré el lente conmigo, pero lo usaré para ciertas ocasiones, realmente este lente es más para efectos especiales, o para panoramas con distorción o elimando la distorción usando post processing en Photosop o PTLens.Pero no puede reemplazar un lente como el Zuiko 11-22mm

Definitivamente se pueden lograr efectos muy agradables con el lente, pero unas cosas que aprendí que más que con otros lentes, es importante fijarse en todos los aspectos de la exposición antes de tirar la foto. Por ejemplo aquí:

Debí haber tenido mas cuidado de pararme al centro del carril, ya que se demarca en este tipo de distorción lo desbalanceado de la foto. Parandome más al centro, hubiera hecho las líneas aún más paralelas, y la distorción de los osos panda en los lados similar, creando un mejor balance en la foto. Aunque como se puede ver, los colores salieron geniales.

He aquí de algunos ejemplos de fotos que me gustaron...


Una de las cosas que me llamo mucho la atención fue el hecho de cuando se toma una foto al cielo, es impresionante la cantidad de espacio que se puede abarcar, con un tripié (o tripoide para los espanoles) se presta muy bien para efectos HDR.

Aqui cambié de camara con la E3 con el de 8mm. no noté muchas diferencias, aunque el IS en la E-3 me ayudó bastante para poder reflejar el movimiento del carrusel ya que dejé el tripié en el carro. Creo que la exposición fue de 1 segundo. El efecto en la consola em gusto bastante...

Recomiendo bastante este lente, intentaré tomar algunos panoramas en el futuro y usar alguna aplicación como PTLens para remover la distorción y haber que tal queda.

El Set completo de mi sesión se encuentra aquí...

Tuesday, September 2, 2008

The Best Camera Bag Ever...

Think Tank Rotation 360

Think Tank is a company that makes photo accessories focusing more on bags, cases and they proud themselves by being the brand that a lot of professionals use. A lot of their bag designs take into consideration input from professionals either sports photography, nature, etc. I will tell you right now, that they are pricey, very pricey but as you will see in my view they are worth the $$.

They have a lot of models for carrying on the field, bags for transporting equipment on airports, etc. I wasn't specifically looking for another bag, but the Rotation 360 caught my eye.

The bag is a very comfortable backpack which it also has a waist buckle. This becomes a deep "fanny" bag that rotates by detaching itself from the main body of the backpack. This rotational bag is very deep and can hold a lot of stuff. You can put lenses, batteries, filters without having to remove it, making access to your equipment much, much easier, better and more comfortable that a slingshot concept. The other major differential for this bag is that it can be enhanced with different attachment containers that can be used to stored extra lenses, filters, etc. I bought an expandable digital holster that can be attached to the bag belt. There are other minor features that are great, the construction is outstanding (zippers, Velcro, etc) other than that is a common backpack.

Setting up the bag

The camera has some features that require some setup, but they are great.

Camera strap: The bag comes with a special camera strap. So in order to use the camera support strap on your back pack, you need to use their camera strap. The camera strap is comfortable, it has some rings that allows you to attach it to the backpack for support.

Camera Support Strap: These are a set of 2 snap clips that go into the shoulder straps in the bag, this takes 2 minutes to setup.

Attaching One Camera: Basically you put your camera around your neck, use the snap clips on the backpack to clip to the rings on the camera strap. This allows your camera not to hang, or jump around giving your hands some freedom of movement.

Attaching 2 cameras: Same approach as before, you can attach one camera a single support strap on one side, and another camera on the other.

Hold down strap: the camera also comes with a strap that can be attached to the buckles on the shoulder straps. This long lens strap joins the shoulder straps together so when your camera is hanging on your chest you put this hold down strap over the camera forcing the lens to point downwards.

Loading the bag.

The bag can hold A LOT of equipment. Here is a list of what I was able to carry:

Top part:

After arranging the strong velcro dividers here is what I was able to put in:

Olympus E3 Flash FR-36 2.0X Teleconverter
Energizer Batteries Set of Filters (Polarizer different sizes) Zuiko 50-200mm 2.8 lens
  IMGP1100  

Front Bag

Cokin ND filters ND filter attachment rings Storm Jacket
     

Rotation Bag

Olympus 410 with 8mm Fish eye lens attached Sigma 30mm lens Zuiko 11-22mm lens
3 Tripod quick release plates Camera Batteries 2 pouches with memory cards
IMGP1106   IMGP1107

The camera has a rain cover that wraps the entire backpack around, and finally you can comfortable set a tripod with a buckle on top of the bag and using the net pocket at the bottom of the bag.

Now, I didn’t use the expandable holster which can fit my

Sigma 50-500mm.

I did not manage to fill up the bag, specially the top part, which could fit still a lot more small stuff like cable release, levels, etc.

IMGP1105

Hauling the bag around

The bag is very comfortable to carry around. I took it out of for a 3 hour spin and my back or shoulders felt great. Obviously the best thing is the waist bag. Here is how it works:

Once you have de attached the bag buckles that holds it in place, you need to pull this strap from the bag waist belt which shifts a velcro IMGP1109 mechanism in place inside the bag. This allows the free motion around the waist allowing the bag to rotate to the front. Once you have done this, you have free access to the waist bag that opens with a zipper. You can use this bag for easy access to reach lenses, another camera body, batteries, etc.  In order to put it back you just need to pull this lock strap again to the lock position (this makes the velcro inside the body bag to appear again) and push the waist back with the handles back into position "shake it" a couple of times so the velcro attaches again, and you are good to go.

The only thing missing from this bag is the capability to carry a small laptop, but overall is the most comfortable, better built camera I own. Is great for long photo walks, nature and hauling equipment for any event.

del.icio.us Tags: ,,,

Places I've shot in