Wednesday, October 29, 2008

Tips on <Using Reflections>

Using reflections can add a new dimension of creativity to your photography. From Mirror, glass buildings, puddles, there is always a possibility to leverage them both in and outdoors. They can be used on any type of photography from landscapes (reflections on lakes), urban (glass windows, puddles)

Puddles

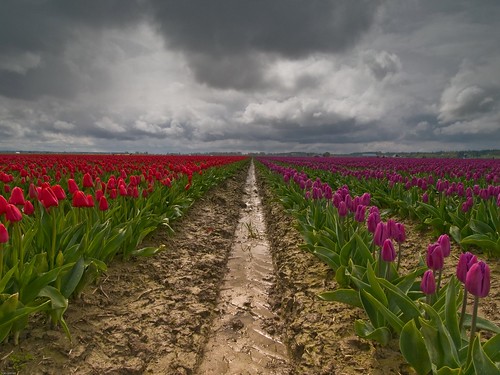
In urban settings, after a storm puddles will be created on the pavement, that can be leveraged to create great pictures of reflections. Dont worry about how clean the water is, sometimes all you need is an outline,

Unusual forms

Certain objects with interesting and complicated shapes will create a great shot if standing next to the reflective surface, as if they were join together. Framing is important in this kind of shot

Refractions

Using water droplets, make sure you get glycerin and either use it instead of water or mix it up half and half. This will allow the droplets to keep their shape for much longer, use a pipette if you want to make sure you get even shape droplets.

For this type of shot a close up macro lens is essential, you will also need a study tripod. Focusing is the most tricky part of this type of shot, focus in a single droplet, and focus on the image reflected not on the water itself. Around f/11 is recommended, this will you a sharp refraction.

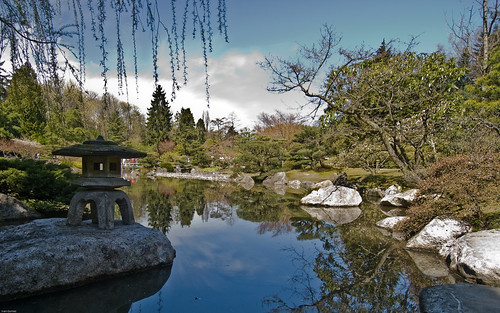
Use tranquil waters to reflect the scene
Glass buildings and puddles are great for creating a composition with reflections


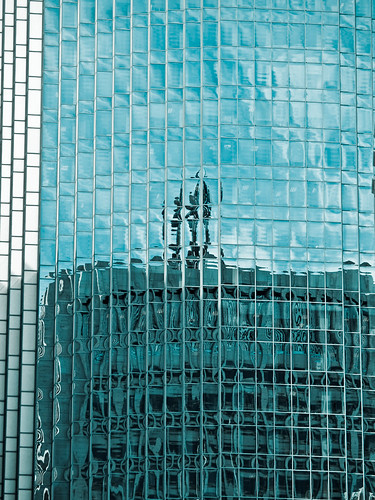
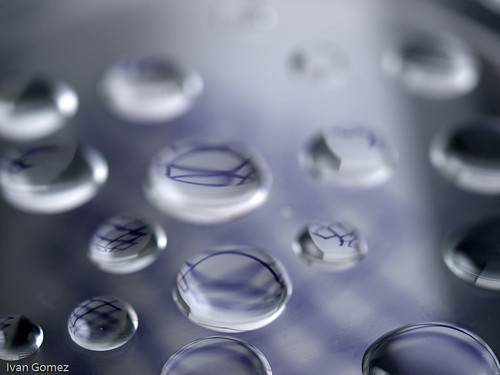
visit my pics at http://www.flickr.com/a207001392 
Using glycerin and an interesting background can make for a very interesting composition.

Tuesday, October 28, 2008

Tips on <Making the most of Landscapes>

These are some tips from professional photographers if you want a better chance to get your landscape shots published:

1) Shot Vertical and Horizontals.

Most of the magazines print vertical shots and most calendars use horizontal pictures. For maximizing each scene and if the scene can work both ways ensure you take both.

2) Compose with text in mind

Most of the photos on printed media will include text one way or another, it is wise when composing leave ample space so that editors can build a message or a magazine cover around it

3) Concentrate on the details

Shooting landscape photography is not always about wide angle lenses or huge vistas, focus on the details around you, sand ripples, waves, shells, .

focus on interesting items on the skyline

4) Work with the light

Usually is better to focus on your landscape when is being light sideways, rather than with the sun behind you. This will bring up interesting details

5) Leverage places of interest

While nature shots are very common, focusing on common places of interest like castles, buildings, markets will increase the possibility of editors using your pictures. Try to be creative and capture the building on a different light

6) Use a remote

Minimize camera shake as much as you can, if you dont have one, use the camera timer  for this

7) Develop a system

Some people use landscape in manual that way you have full range of settings. A common aperture would be f/16 as a smaller aperture sometimes sacrifice sharpness on some lenses. Focus a third of the way into the shoot, and dial a shutter speed as recommended from the metering system. Take a shot and check your histogram, remember to keep checking your settings as light can change in a matter of minutes specially at dawn and dusk.

Use a wide aperture, dont go all the way to f/22 and focus a third on the shot

8) Include people in the shot.

As a matter of sense, sometimes a pure shot of the landscape would be more pleasant, however the great majority of shots that get published on magazines include a “living” creature, people, pets, animals, insects, etc.

Monday, October 27, 2008

Tips on <Halloween>

I saw this great tip for creating Jack-O-Lanters thanks to the friends of Photojojo.They are basically using Photography to come up with a very cool way to create a design that you can carve on your pumpkin. Here is the summary in their own words:

carving your own scary photos onto that pumpkin instead of the usual triangle eyes and pointy teeth. All you need is a scary picture and a little know-how. Read on for the full details on how to make your own photo pumpkins.

Enjoy

Places I've shot in