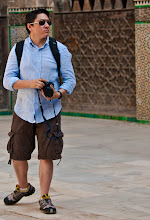
Practice your stand
- Legs parallel to shoulders
- Elbows tucked on the side
- Rotate Upper Body
- Use sequence shooting
- Predictive autofocus
- Study the behavior of the bird if possible
- Give it space to fly into the frame
- Select one AF Dot change it depending on where to frame subject
- Afternoon shots are better
- If against a bright sky increase the exposure level
- Dont be afraid to increasr the ISO
- Dont forget to rotate the polarizer filter to see perspective
Become and observer then a photographer
- Get field guide for your area, learn about bird migrations and season in your area
- Learn their behavior, birds are creatures of habit, you will be able to anticipate their moves after a while
Start with larger, slower moving birds
- Start with sea gulls and herons, master this and then you will capture smaller faster birds
Use the right gear
- Start witth a small lense 400mm 5.6, Get a fast focusing SLR and as you get more into it, spend the money on better lenses
- Dont use a tripod, or get a tripod with a special head specifically design for bird photography (runs around $400.00)
- Shoulder stock can help steady the camera
- Image Stabilization either on camera or lense will go a long way
Get in position
- Spread your feet at least at sholder width to give freedom of movement to follow trough the viewfinder
- Hold the camera firm but relaxed grip
- While panning avoid sudden, erratic movement. Keep it smooth and dont stop even when the shutter releases
Follow the birds flight patter with your eye not the viewfinder.
- Oftem aim slightly ahead of the subject, depending on speed
- Always have the camera turned on and in position, a fly-by can happen any time
Set your exposure
- FOr birds in motion the best is manual expisure
- Meter for the subject and it will be exposed properly. For begginers start with Program mode and bracket until you get the hang of it
- In Manual mode use partial or evaluative metering to get a light reading from the subject.
- Shutter speed is vital, go for 1/1250 or faster with ISO of 320 or 400
Use autofocus wisely
- Most high-end DSLR have a continuos autofocus. With this function you press the shutter half way and the camera continually calculates where the sub ject wull be adjusting the focus as long as the subject sytays in the autofocus area of the viewfinder. This is by far the best way to focus when you are shooting birds in flight
- Use the center AF only this is the fastest and best way to obtain focus on the bird's eye, specially for larger birds. For smaller, faster mioving bird you can use multiple focus pointsm this will allow the camera to choose an AF point from an array covering a wide area of the frame. Multipoint focus works well on solid backgrounds such as blue skies but doesnt work effectively on varied backgrounds like grasses and trees
Consider the sun and wind
- Sunlight is crucial. Later afternoon an early morning are good times to shoot.
- Have the sun behind you at all times with the subject in front of you.


0 comments:
Post a Comment