Think Tank Rotation 360
Think Tank is a company that makes photo accessories focusing more on bags, cases and they proud themselves by being the brand that a lot of professionals use. A lot of their bag designs take into consideration input from professionals either sports photography, nature, etc. I will tell you right now, that they are pricey, very pricey but as you will see in my view they are worth the $$.
They have a lot of models for carrying on the field, bags for transporting equipment on airports, etc. I wasn't specifically looking for another bag, but the Rotation 360 caught my eye.
The bag is a very comfortable backpack which it also has a waist buckle. This becomes a deep "fanny" bag that rotates by detaching itself from the main body of the backpack. This rotational bag is very deep and can hold a lot of stuff. You can put lenses, batteries, filters without having to remove it, making access to your equipment much, much easier, better and more comfortable that a slingshot concept. The other major differential for this bag is that it can be enhanced with different attachment containers that can be used to stored extra lenses, filters, etc. I bought an expandable digital holster that can be attached to the bag belt. There are other minor features that are great, the construction is outstanding (zippers, Velcro, etc) other than that is a common backpack.
Setting up the bag
The camera has some features that require some setup, but they are great.
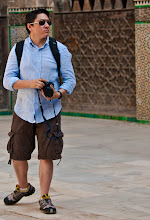
Camera strap: The bag comes with a special camera strap. So in order to use the camera support strap on your back pack, you need to use their camera strap. The camera strap is comfortable, it has some rings that allows you to attach it to the backpack for support.
Camera Support Strap: These are a set of 2 snap clips that go into the shoulder straps in the bag, this takes 2 minutes to setup.
Attaching One Camera: Basically you put your camera around your neck, use the snap clips on the backpack to clip to the rings on the camera strap. This allows your camera not to hang, or jump around giving your hands some freedom of movement.
Attaching 2 cameras: Same approach as before, you can attach one camera a single support strap on one side, and another camera on the other.
Hold down strap: the camera also comes with a strap that can be attached to the buckles on the shoulder straps. This long lens strap joins the shoulder straps together so when your camera is hanging on your chest you put this hold down strap over the camera forcing the lens to point downwards.
Loading the bag.
The bag can hold A LOT of equipment. Here is a list of what I was able to carry:
Top part:
After arranging the strong velcro dividers here is what I was able to put in:
| Olympus E3 | Flash FR-36 | 2.0X Teleconverter |
| Energizer Batteries | Set of Filters (Polarizer different sizes) | Zuiko 50-200mm 2.8 lens |
 |
Front Bag
| Cokin ND filters | ND filter attachment rings | Storm Jacket |
Rotation Bag
| Olympus 410 with 8mm Fish eye lens attached | Sigma 30mm lens | Zuiko 11-22mm lens |
| 3 Tripod quick release plates | Camera Batteries | 2 pouches with memory cards |
 |  |
The camera has a rain cover that wraps the entire backpack around, and finally you can comfortable set a tripod with a buckle on top of the bag and using the net pocket at the bottom of the bag.
Now, I didn’t use the expandable holster which can fit my
Sigma 50-500mm.I did not manage to fill up the bag, specially the top part, which could fit still a lot more small stuff like cable release, levels, etc.

Hauling the bag around
The bag is very comfortable to carry around. I took it out of for a 3 hour spin and my back or shoulders felt great. Obviously the best thing is the waist bag. Here is how it works:
Once you have de attached the bag buckles that holds it in place, you need to pull this strap from the bag waist belt which shifts a velcro  mechanism in place inside the bag. This allows the free motion around the waist allowing the bag to rotate to the front. Once you have done this, you have free access to the waist bag that opens with a zipper. You can use this bag for easy access to reach lenses, another camera body, batteries, etc. In order to put it back you just need to pull this lock strap again to the lock position (this makes the velcro inside the body bag to appear again) and push the waist back with the handles back into position "shake it" a couple of times so the velcro attaches again, and you are good to go.
The only thing missing from this bag is the capability to carry a small laptop, but overall is the most comfortable, better built camera I own. Is great for long photo walks, nature and hauling equipment for any event.


0 comments:
Post a Comment